The sed command is an interactive text editor like nano. Sed Linux command edits data based on the rules you provide, you can use it like this:
$ sed options file
You are not limited to use sed to manipulate files, you apply it to the STDIN directly like this:
$ echo "Welcome to LikeGeeks page" | sed 's/page/website/'

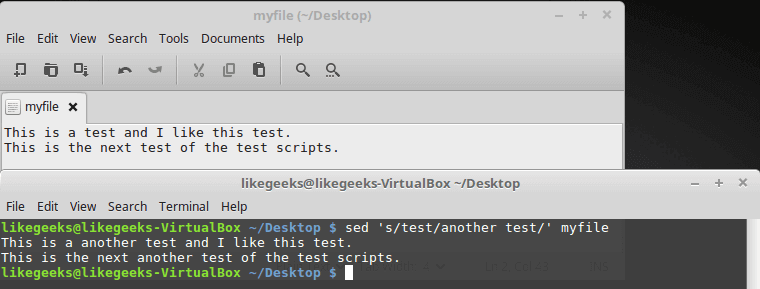
The s command replaces the first text with the second text pattern. In this case, the string “website” was replaced with the word “page”, so the result will be as shown.
The above example was a very basic example to demonstrate the tool. We can use sed Linux command to manipulate files as well.
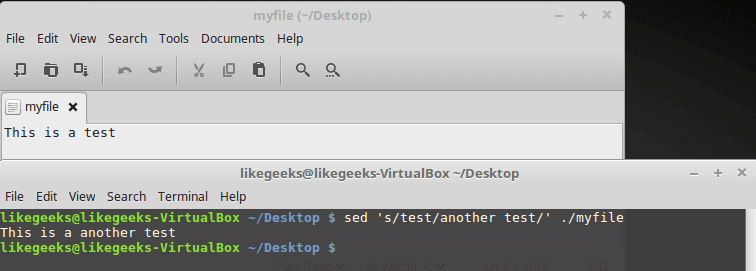
This is our file:

$ sed 's/test/another test' ./myfile
The results are printed to the screen instantaneously, you don’t have to wait for processing the file to the end.
If your file is huge enough, you will see the result before the processing is finished.
Sed Linux command doesn’t update your data. It only sends the changed text to STDOUT. The file still untouched. If you need to overwrite the existing content, you can check our previous post which was talking about redirections.
Using Multiple sed Linux Commands in The Command Line
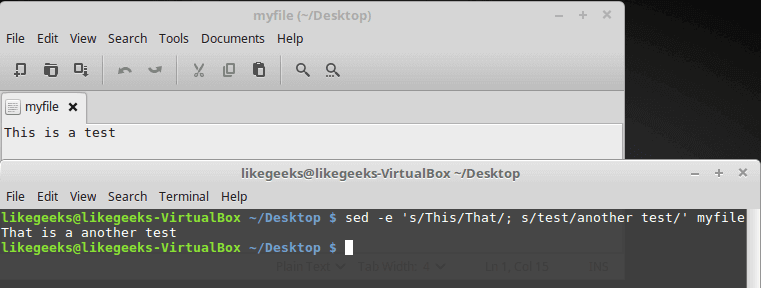
To run multiple sed commands, you can use the -e option like this:
$ sed -e 's/This/That/; s/test/another test/' ./myfile

Sed command must be separated by a semi colon without any spaces.
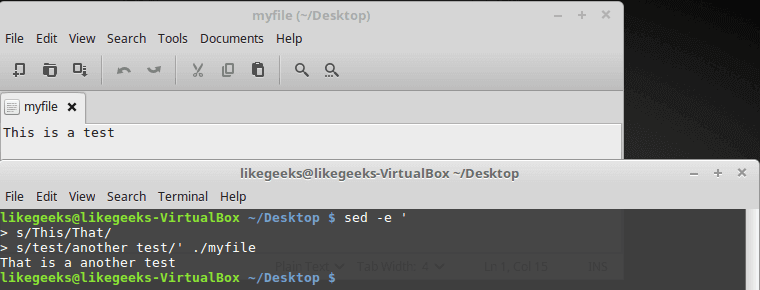
Also, you can use a single quotation to separate commands like this:
$ sed -e '
> s/This/That/
> s/test/another test/' myfile

The same result, no big deal.
Reading Commands From a File
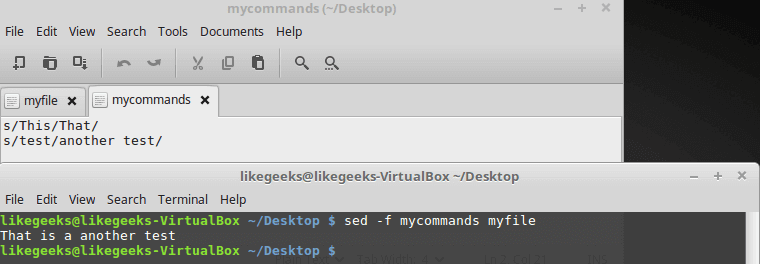
You can save your sed commands in a file and use them by specifying the file using -f option.
$ cat mycommands
s/This/That/
s/test/another test/
$ sed -f mycommands myfile

Substituting Flags
Look at the following example carefully:
$ cat myfile
$ sed 's/test/another test/' myfile

The above result shows the first occurrence in each line is only replaced. To substitute all occurrences of a pattern, use one of the following substitution flags.
The flags are written like this:
s/pattern/replacement/flags
There are four types of substitutions:
g, replace all occurrences.
A number, the occurrence number for the new text that you want to substitute.
p, print the original content.
w file: means write the results to a file.
You can limit your replacement by specifying the occurrence number that should be replaced like this:
$ sed 's/test/another test/2' myfile

As you can see, only the second occurrence on each line was replaced.
The g flag means global, which means a global replacement for all occurrences:
$ sed 's/test/another test/2' myfile

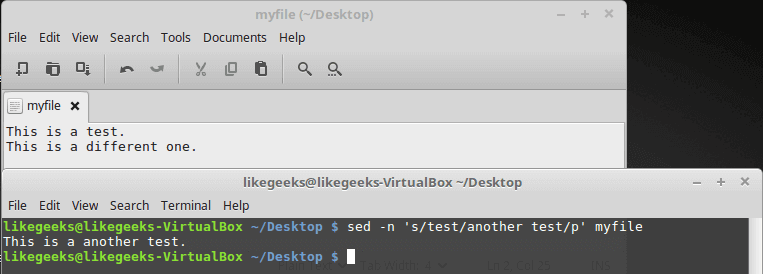
The p flag prints each line contains a pattern match, you can use the -n option to print the modified lines only.
$ cat myfile
$ sed -n 's/test/another test/p' myfile

The w flag saves the output to a specified file:
$ sed 's/test/another test/w output' myfile

The output is printed on the screen, but the matching lines are saved to the output file.
Replace Characters
Suppose that you want to search for bash shell and replace it with csh shell in the /etc/passwd file using sed, well, you can do it easily:
$ sed 's/\/bin\/bash/\/bin\/csh/' /etc/passwd
Oh!! that looks terrible.
Luckily, there is another way to achieve that. You can use the exclamation mark (!) as string delimiter like this:
$ sed 's!/bin/bash!/bin/csh!' /etc/passwd
Now it’s easier to read.
Limiting sed
Sed command processes your entire file. However, you can limit the sed command to process specific lines, there are two ways:
- A range of lines.
- A pattern that matches a specific line.
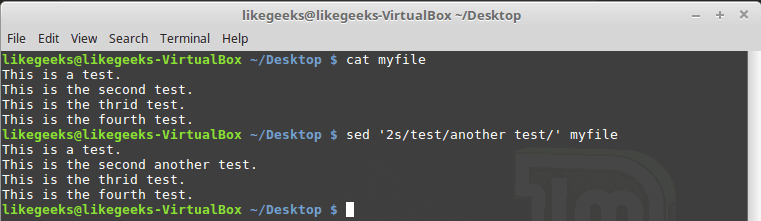
You can type one number to limit it to a specific line:
$ sed '2s/test/another test/' myfile

Only line two is modified.
What about using a range of lines:
$ sed '2,3s/test/another test/' myfile

Also, we can start from a line to the end of the file:
$ sed '2,$s/test/another test/' myfile

Or you can use a pattern like this:
$ sed '/likegeeks/s/bash/csh/' /etc/passwd

Awesome!!
You can use regular expressions to write this pattern to be more generic and useful.
Delete Lines
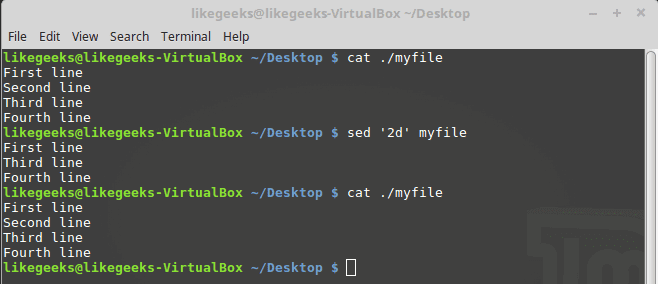
To delete lines, the delete (d) flag is your friend.
The delete flag deletes the text from the stream, not the original file.
$ sed '2d' myfile

Here we delete the second line only from myfile.
What about deleting a range of lines?
$ sed '2,3d' myfile

Here we delete a range of lines, the second and the third.
Another type of ranges:
$ sed '3,$d' myfile

Here we delete from the third line to the end of the file.
All these examples never modify your original file.
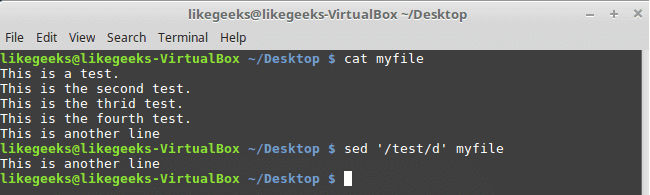
$ sed '/test 1/d' myfile

Here we use a pattern to delete the line if matched on the first line.
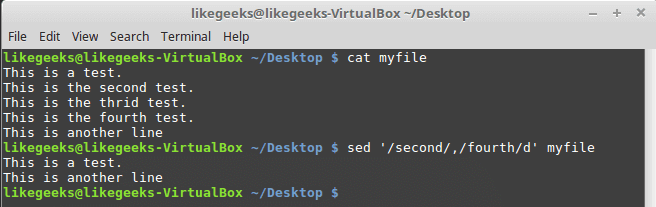
If you need to delete a range of lines, you can use two text patterns like this:
$ sed '/second/,/fourth/d' myfile

The first to the third line deleted.
Insert and Append Text
You can insert or append text lines using the following flags:
- The (i) flag.
- The (a) flag.
$ echo "Another test" | sed 'i\First test '

Here the text is added before the specified line.
$ echo "Another test" | sed 'a\First test '

Here the text is added after the specified line.
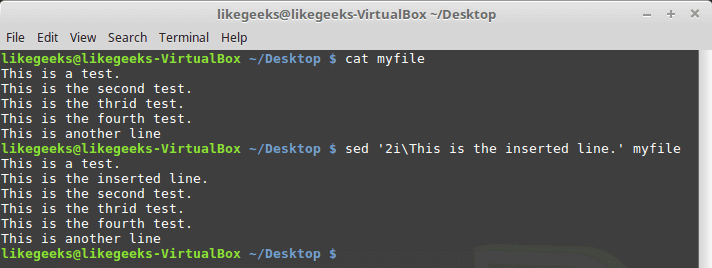
Well, what about adding text in the middle?
Easy, look at the following example:
$ sed '2i\This is the inserted line.' myfile

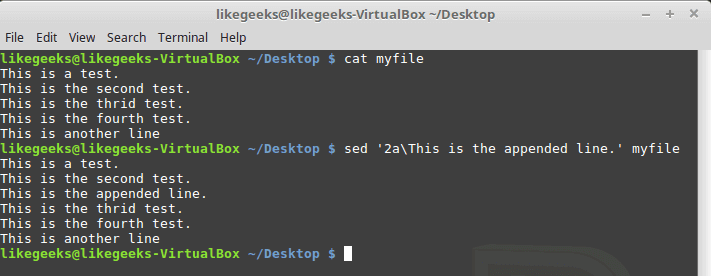
And the appending works the same way, but look at the position of the appended text:
$ sed '2a\This is the appended line.' myfile

The same flags are used but with a location of insertion or appending.
Modifying Lines
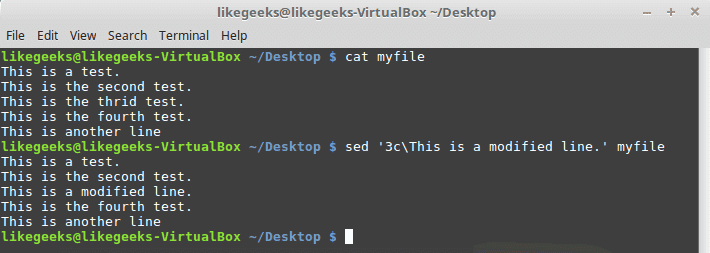
To modify a specific line, you can use the (c) flag like this:
$ sed '3c\This is a modified line.' myfile

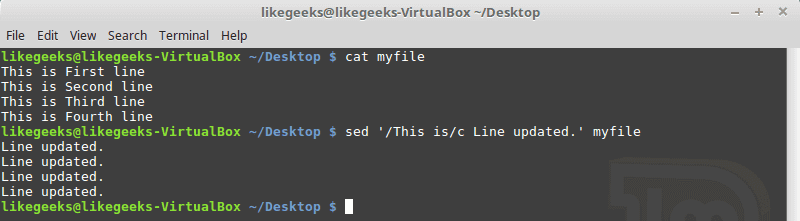
You can use a regular expression pattern and all lines match that pattern will be modified.
$ sed '/This is/c Line updated.' myfile

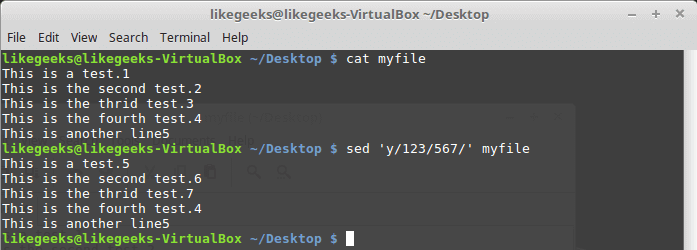
Transform Characters
The transform flag (y) works on characters like this:
$ sed 'y/123/567/' myfile

The transformation is applied to all data and cannot be limited to a specific occurrence.
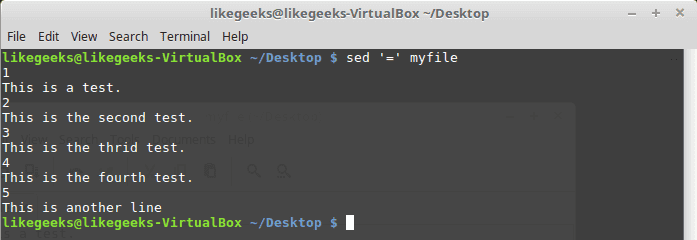
Print Line Numbers
You can print line number using the (=) sign like this:
$ sed '=' myfile

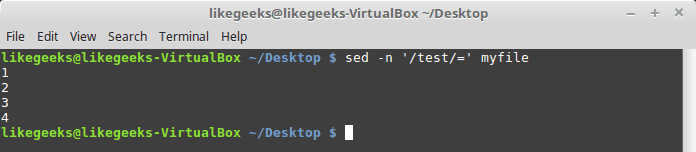
However, by using -n combined with the equal sign, the sed command displays the line number that contains matching.
$ sed -n '/test/=' myfile

Read Data From a File
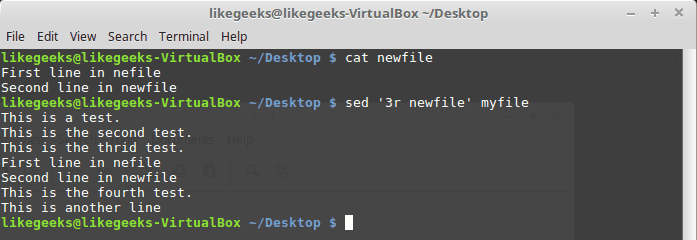
You can use the (r) flag to read data from a file.
You can define a line number or a text pattern for the text that you want to read.
$ cat newfile
$ sed '3r newfile' myfile
The content is just inserted after the third line as expected.
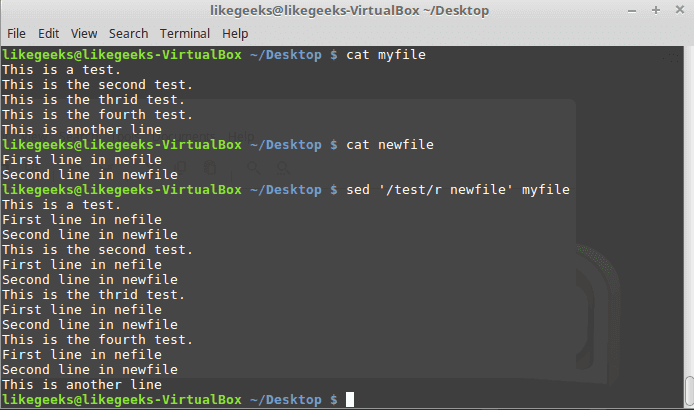
And this is using a text pattern:
$ sed '/test/r newfile' myfile

Cool right?
Useful Examples
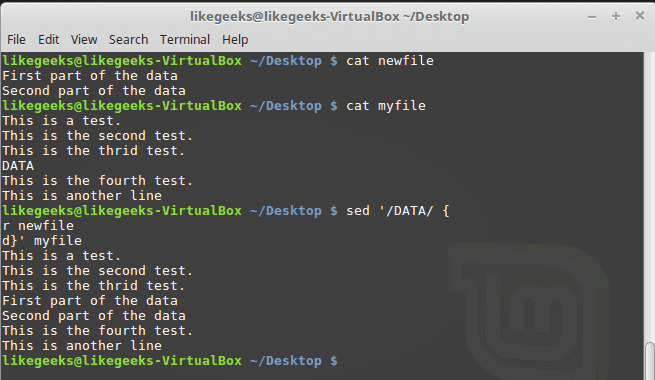
We have a file that contains a text with a placeholder and we have another file that contains the data that will be filled in that placeholder.
We will use the (r) and (d) flags to do the job.
The word DATA in that file is a placeholder for a real content which is stored in another file called data.
We will replace it with the actual content:
$ Sed '/DATA>/ {
r newfile
d}' myfile

Awesome!! as you can see, the placeholder location is filled with the data from the other file.
This is just a very small intro about sed command. Actually, sed Linux command is another world by itself.
The only limitation is your imagination.
I hope you enjoy what’ve introduced today about the string manipulation using sed Linux command.
Thank you.
likegeeks.com

 GNU/Linux kullanıcıları için terminal tabanlı metin düzenleyicileri söz konusu aldığında akla gelen ilk isimler; Vim, Emacs ve Nano olarak sıralanabilir. Kuşkusuz bu, bütün seçenekleri göstermiyor, mesela Neovim gibi pek çok örnek saymak mümkündür. İşte bu seçeneklerden biri olan ve Rust programlama diliyle yazılan; yerleşik dil sunucusu desteği, içeriğe duyarlı tamamlama, tanılama ve kod eylemleri sağlayan Helix terminal tabanlı metin düzenleyicisinin 0.0.10 sürümü duyuruldu. Ekranın üstüne/ortasına/altına atlamak için gt/gm/gb eşlemeleri eklenen yeni sürüme, Haskell sözdizimi ve pencere modu (ctrl-w) eklenmiş bulunuyor. Temaların artık stil değiştiricilerinin desteklendiği belirtilirken, sürüm, ayrıca çeşitli düzeltmelerle geliyor. Arch Linux kullanıcıları için AUR kullanarak uygulamayı kurmak mümkün, ancak diğer dağıtımların kullanıcılarının uygulamayı kurmak için Rust paket yöneticisi olan Cargo’yu kullanması gerekiyor. Helix terminal tabanlı metin düzenleyicisi 0.0.10 hakkında ayrıntılı bilgi edinmek için sürüm duyurusunu inceleyebilirsiniz.
 Geçen yıl benzer bir teklif gönderilmiş, ancak, varsayılan olarak Vi yerine Nano kullanılmasına karar verilmişti. Nano’yu varsayılan olarak kullanma önerisi, “uzmanlık bilgisi gerektirmeyen bir varsayılan düzenleyiciye sahip olmak” fikrinden yola çıkılarak desteklenmişti.
  Bilindiği gibi,

 Bilindiği gibi, takas (swap) alanı, fiziksel
  In the previous post, we talked about