
 GNUstep‘in tümleşik geliştirme ortamı (IDE) olan ve hızlı geliştirme ve kolay yönetim olanağı sağlayan ProjectCenter‘in 0.7.0 sürümü, Riccardo Mottola tarafından duyuruldu. GNUstep üzerinde çalışan ProjectCenter; uygulamalar, araçlar ve çerçeveler sağlıyor. ‘Application’, ‘Bundle’, ‘Library’, ‘Tool’ ve ‘Aggregate’ proje türlerini destekleyen ProjectCenter, proje makefile’lerini otomatik olarak oluşturur ve düzenleme, proje derleme, paket oluşturma ve hata ayıklama sürecinde kullanıcıya yardımcı olur. Gelecekte yerleşik CVS desteği de sunulacağı belirtiliyor. NeXT’in orijinal proje oluşturucusundan esinlenen ve XCode’un eşdeğeri olan ProjectCenter, yeni projeler başlatmaya yardımcı olur, sezgisel ve iyi düzenlenmiş bir grafik kullanıcı arabirimi kullanarak proje dosyalarını yönetmeye olanak tanır. Yeni sürümün, güncel GNUstep ve son derleyicilerle güncel kalmak için kapsamlı bir temizlikle geldiğini belirten Riccardo Mottola; proje şablonlarında ve makefile oluşturmada iyileştirmeler sağlandığını ifade etti. Tercih düzeltmeleri ve düzenleyici renkleri düzeltmeleriyle gelen yeni sürümün, bir zamanlayıcı ile gerçekleşen yeniden ayrıştırma ile sözdizimi vurgulamada performans iyileştirmeleri getirdiği, bunun, yükü azaltacağı ve Raspberry gibi daha yavaş sistemlerde de kullanıma izin vereceği belirtiliyor. ProjectCenter 0.7.0 hakkında bilgi edinmek için sürüm duyurusunu ya da GitHub duyurusunu inceleyebilirsiniz.
Tag Archives | tool
Expect command and how to automate shell scripts like magic
 In the previous post, we talked about writing practical shell scripts and we saw how it is easy to write a shell script. Today we are going to talk about a tool that does magic to our shell scripts, that tool is the Expect command or Expect scripting language. Expect command or expect scripting language is a language that talks with your interactive programs or scripts that require user interaction. Expect scripting language works by expecting input, then the Expect script will send the response without any user interaction. You can say that this tool is your robot which will automate your scripts.
If Expect command if not installed on your system, you can install it using the following command:
$ apt-get install expect
Or on Red Hat based systems like CentOS:
$ yum install expect
Expect Command
Before we talk about expect command, Let’s see some of the expect command which used for interaction:
spawn Starting a script or a program.
expect Waiting for program output.
send Sending a reply to your program.
interact Allowing you in interact with your program.
- The spawn command is used to start a script or a program like the shell, FTP, Telnet, SSH, SCP, and so on.
- The send command is used to send a reply to a script or a program.
- The Expect command waits for input.
- The interact command allows you to define a predefined user interaction.
We are going to type a shell script that asks some questions and we will make an Expect script that will answer those questions.
First, the shell script will look like this:
#!/bin/bash
echo "Hello, who are you?"
read $REPLY
echo "Can I ask you some questions?"
read $REPLY
echo "What is your favorite topic?"
read $REPLY
Now we will write the Expect scripts that will answer this automatically:
#!/usr/bin/expect -f
set timeout -1
spawn ./questions
expect "Hello, who are you?\r"
send -- "Im Adam\r"
expect "Can I ask you some questions?\r"
send -- "Sure\r"
expect "What is your favorite topic?\r"
send -- "Technology\r"
expect eof
The first line defines the expect command path which is #!/usr/bin/expect.
On the second line of code, we disable the timeout. Then start our script using spawn command.
We can use spawn to run any program we want or any other interactive script.
The remaining lines are the Expect script that interacts with our shell script.
The last line if the end of file which means the end of the interaction.
Now Showtime, let’s run our answer bot and make sure you make it executable.
$ chmod +x ./answerbot
$./answerbot
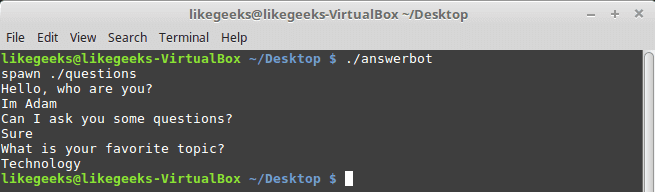
Cool!! All questions are answered as we expect.
If you get errors about the location of Expect command you can get the location using the which command:
$ which expect
We did not interact with our script at all, the Expect program do the job for us.
The above method can be applied to any interactive script or program.Although the above Expect script is very easy to write, maybe the Expect script little tricky for some people, well you have it.
Using autoexpect
To build an expect script automatically, you can the use autoexpect command.
autoexpect works like expect, but it builds the automation script for you. The script you want to automate is passed to autoexpect as a parameter and you answer the questions and your answers are saved in a file.
$ autoexpect ./questions
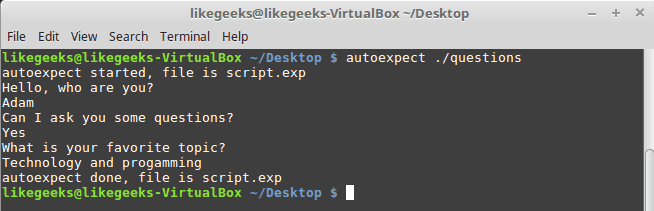
A file is generated called script.exp contains the same code as we did above with some additions that we will leave it for now.

If you run the auto generated file script.exp, you will see the same answers as expected:
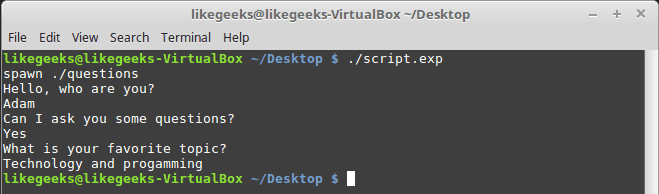
Awesome!! That super easy.
There are many commands that produce changeable output, like the case of FTP programs, the expect script may fail or stuck. To solve this problem, you can use wildcards for the changeable data to make your script more flexible.
Working with Variables
The set command is used to define variables in Expect scripts like this:
set MYVAR 5
To access the variable, precede it with $ like this $VAR1
To define command line arguments in Expect scripts, we use the following syntax:
set MYVAR [lindex $argv 0]
Here we define a variable MYVAR which equals the first passed argument.
You can get the first and the second arguments and store them in variables like this:
set my_name [lindex $argv 0]
set my_favorite [lindex $argv 1]
Let’s add variables to our script:
#!/usr/bin/expect -f
set my_name [lindex $argv 0]
set my_favorite [lindex $argv 1]
set timeout -1
spawn ./questions
expect "Hello, who are you?\r"
send -- "Im $my_name\r"
expect "Can I ask you some questions?\r"
send -- "Sure\r"
expect "What is your favorite topic?\r"
send -- "$my_favorite\r"
expect eof
Now try to run the Expect script with some parameters to see the output:
$ ./answerbot SomeName Programming

Awesome!! Now our automated Expect script is more dynamic.
Conditional Tests
You can write conditional tests using braces like this:
expect {
"something" { send -- "send this\r" }
"*another" { send -- "send another\r" }
}
We are going to change our script to return different conditions, and we will change our Expect script to handle those conditions.
We are going to emulate different expects with the following script:
#!/bin/bash
let number=$RANDOM
if [ $number -gt 25000 ]; then
echo "What is your favorite topic?"
else
echo "What is your favorite movie?"
fi
read $REPLY
A random number is generated every time you run the script and based on that number, we put a condition to return different expects.
Let’s make out Expect script that will deal with that.
#!/usr/bin/expect -f
set timeout -1
spawn ./questions
expect {
"*topic?" { send -- "Programming\r" }
"*movie?" { send -- "Star wars\r" }
}
expect eof
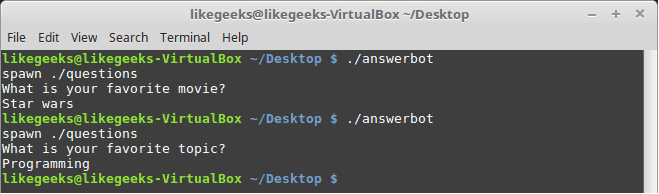
Very clear. If the script hits the topic output, the Expect script will send programming and if the script hits movie output the expect script will send star wars. Isn’t cool?
If else Conditions
You can use if/else clauses in expect scripts like this:
#!/usr/bin/expect -f
set NUM 1
if { $NUM < 5 } {
puts "\Smaller than 5\n"
} elseif { $NUM > 5 } {
puts "\Bigger than 5\n"
} else {
puts "\Equals 5\n"
}

Note: The opening brace must be on the same line.
While Loops
While loops in expect language must use braces to contain the expression like this:
#!/usr/bin/expect -f
set NUM 0
while { $NUM <= 5 } {
puts "\nNumber is $NUM"
set NUM [ expr $NUM + 1 ]
}
puts ""

For Loops
To make a for loop in expect, three fields must be specified, like the following format:
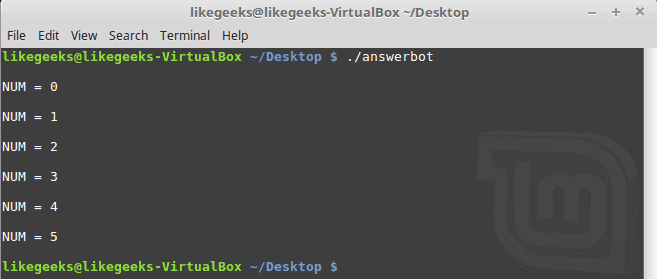
#!/usr/bin/expect -f
for {set NUM 0} {$NUM <= 5} {incr NUM} {
puts "\nNUM = $NUM"
}
puts ""
User-defined Functions
You can define a function using proc like this:
proc myfunc { TOTAL } {
set TOTAL [expr $TOTAL + 1]
return "$TOTAL"
}
And you can use them after that.
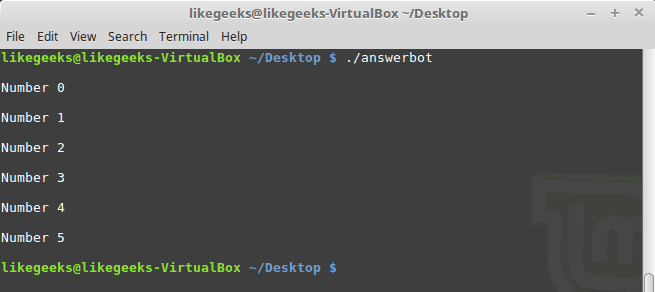
#!/usr/bin/expect -f
proc myfunc { TOTAL } {
set TOTAL [expr $TOTAL + 1]
return "$TOTAL"
}
set NUM 0
while {$NUM <= 5} {
puts "\nNumber $NUM"
set NUM [myfunc $NUM]
}
puts ""
Interact Command
Sometimes your Expect script contains some sensitive information that you don’t want to share with other users who use your Expect scripts, like passwords or any other data, so you want your script to take this password from you and continuing automation normally.
The interact command reverts the control back to the keyboard.
When this command is executed, Expect will start reading from the keyboard.
This shell script will ask about the password as shown:
#!/bin/bash
echo "Hello, who are you?"
read $REPLY
echo "What is you password?"
read $REPLY
echo "What is your favorite topic?"
read $REPLY
Now we will write the Expect script that will prompt for the password:
#!/usr/bin/expect -f
set timeout -1
spawn ./questions
expect "Hello, who are you?\r"
send -- "Hi Im Adam\r"
expect "*password?\r"
interact ++ return
send "\r"
expect "*topic?\r"
send -- "Technology\r"
expect eof

After you type your password type ++ and the control will return back from the keyboard to the script.
Expect language is ported to many languages like C#, Java, Perl, Python, Ruby and Shell with almost the same concepts and syntax due to its simplicity and importance.
Expect scripting language is used in quality assurance, network measurements such as echo response time, automate file transfers, updates, and many other uses.
I hope you now supercharged with some of the most important aspects of Expect command, autoexpect command and how to use it to automate your tasks in a smarter way.
Thank you.

31+ Examples for sed Linux Command in Text Manipulation
 In the previous post, we talked about bash functions and how to use them from the command line directly and we saw some other cool stuff. Today we will talk about a very useful tool for string manipulation called sed or sed Linux command. Sed is used to work with text files like log files, configuration files, and other text files. In this post, we are going to focus on sed Linux command which is used for text manipulation, which is a very important step in our bash scripting journey. Linux system provides some tools for text processing, one of those tools is sed. We will discuss the 31+ examples with pictures to show the output of every example.
Understand sed Linux Command
The sed command is a non-interactive text editor. Sed Linux command edits data based on the rules you provide, you can use it like this:
sed options file
You are not limited to use sed to manipulate files, you apply it to the STDIN directly like this:
echo "Welcome to LikeGeeks page" | sed 's/page/website/'

The s command replaces the first text with the second text pattern. In this case, the string “website” was replaced with the word “page”, so the result will be as shown.
The above example was a very basic example to demonstrate the tool. We can use sed Linux command to manipulate files as well.
This is our file:
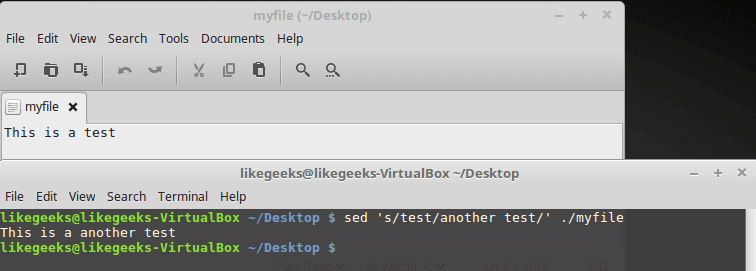
sed 's/test/another test/' ./myfile
The results are printed to the screen instantaneously, you don’t have to wait for processing the file to the end.
If your file is huge enough, you will see the result before the processing is finished.
Sed Linux command doesn’t update your data. It only sends the changed text to STDOUT. The file still untouched. If you need to overwrite the existing content, you can check our previous post which was talking about redirections.
Using Multiple sed Linux Commands in The Command Line
To run multiple sed commands, you can use the -e option like this:
sed -e 's/This/That/; s/test/another test/' ./myfile
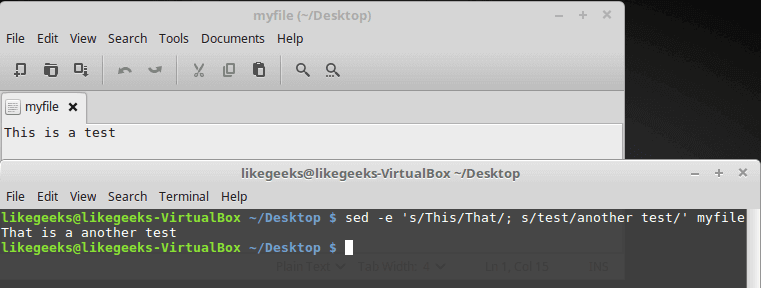
Sed command must be separated by a semicolon without any spaces.
Also, you can use a single quotation to separate commands like this:
sed -e '
> s/This/That/
> s/test/another test/' myfile
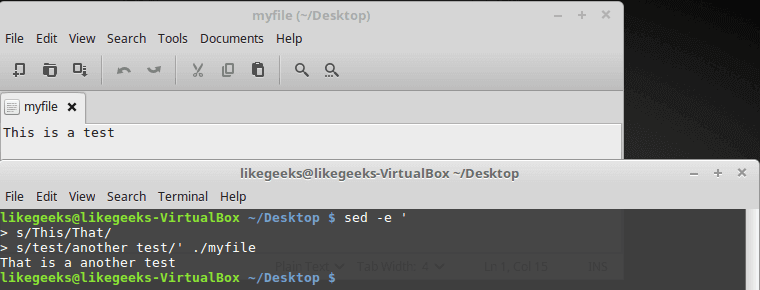
The same result, no big deal.
Reading Commands From a File
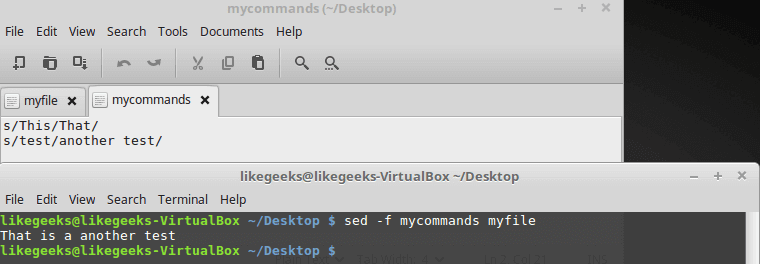
You can save your sed commands in a file and use them by specifying the file using -f option.
cat mycommands
s/This/That/
s/test/another test/
sed -f mycommands myfile
Substituting Flags
Look at the following example carefully:
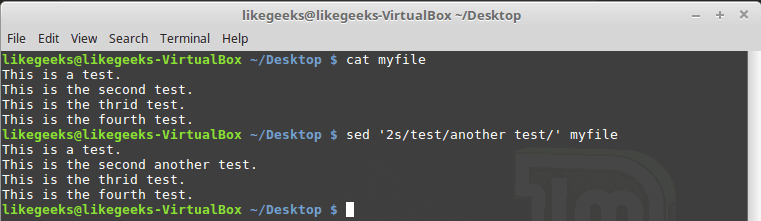
cat myfile
sed 's/test/another test/' myfile
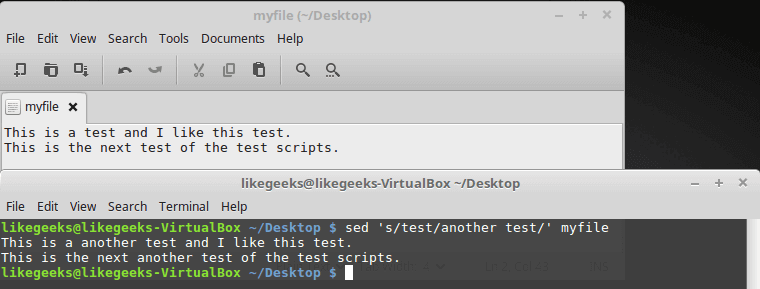
The above result shows the first occurrence in each line is only replaced. To substitute all occurrences of a pattern, use one of the following substitution flags.
The flags are written like this:
s/pattern/replacement/flags
There are four types of substitutions:
- g, replace all occurrences.
- A number, the occurrence number for the new text that you want to substitute.
- p, print the original content.
- w file: means write the results to a file.
You can limit your replacement by specifying the occurrence number that should be replaced like this:
sed 's/test/another test/2' myfile

As you can see, only the second occurrence on each line was replaced.
The g flag means global, which means a global replacement for all occurrences:
sed 's/test/another test/g' myfile

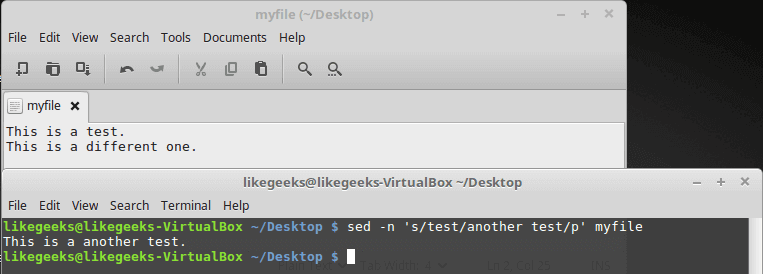
The p flag prints each line contains a pattern match, you can use the -n option to print the modified lines only.
cat myfile
sed -n 's/test/another test/p' myfile
The w flag saves the output to a specified file:
sed 's/test/another test/w output' myfile

The output is printed on the screen, but the matching lines are saved to the output file.
Replace Characters
Suppose that you want to search for bash shell and replace it with csh shell in the /etc/passwd file using sed, well, you can do it easily:
sed 's/\/bin\/bash/\/bin\/csh/' /etc/passwd
Oh!! that looks terrible.
Luckily, there is another way to achieve that. You can use the exclamation mark (!) as string delimiter like this:
sed 's!/bin/bash!/bin/csh!' /etc/passwd
Now it’s easier to read.
Limiting sed
Sed command processes your entire file. However, you can limit the sed command to process specific lines, there are two ways:
- A range of lines.
- A pattern that matches a specific line.
You can type one number to limit it to a specific line:
sed '2s/test/another test/' myfile
Only line two is modified.
What about using a range of lines:
sed '2,3s/test/another test/' myfile

Also, we can start from a line to the end of the file:
sed '2,$s/test/another test/' myfile

Or you can use a pattern like this:
sed '/likegeeks/s/bash/csh/' /etc/passwd

Awesome!!
You can use regular expressions to write this pattern to be more generic and useful.
Delete Lines
To delete lines, the delete (d) flag is your friend.
The delete flag deletes the text from the stream, not the original file.
sed '2d' myfile
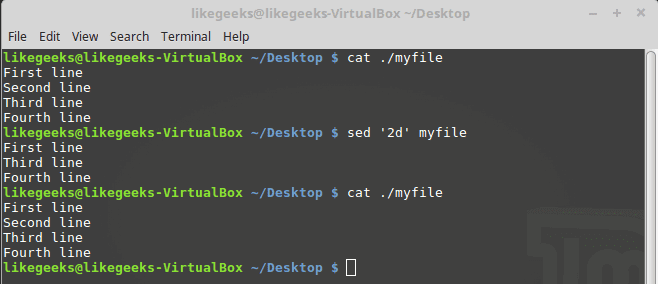
Here we delete the second line only from myfile.
What about deleting a range of lines?
sed '2,3d' myfile

Here we delete a range of lines, the second and the third.
Another type of ranges:
sed '3,$d' myfile

Here we delete from the third line to the end of the file.
All these examples never modify your original file.
sed '/test 1/d' myfile
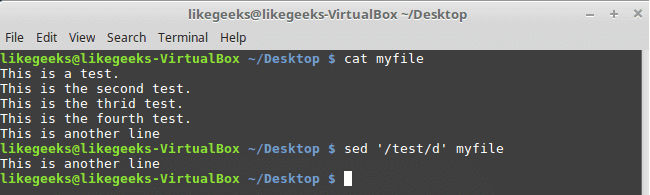
Here we use a pattern to delete the line if matched on the first line.
If you need to delete a range of lines, you can use two text patterns like this:
sed '/second/,/fourth/d' myfile
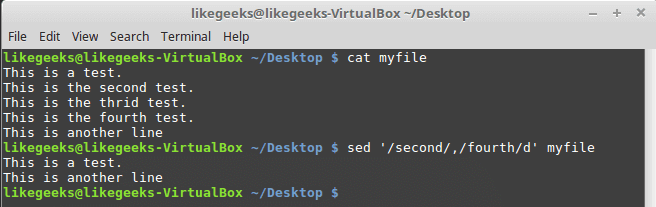
From the second to the fourth line are deleted.
Insert and Append Text
You can insert or append text lines using the following flags:
- The (i) flag.
- The (a) flag.
echo "Another test" | sed 'i\First test '

Here the text is added before the specified line.
echo "Another test" | sed 'a\First test '

Here the text is added after the specified line.
Well, what about adding text in the middle?
Easy, look at the following example:
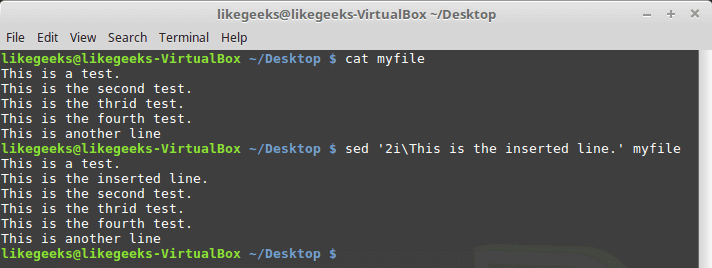
sed '2i\This is the inserted line.' myfile
And the appending works the same way, but look at the position of the appended text:
sed '2a\This is the appended line.' myfile
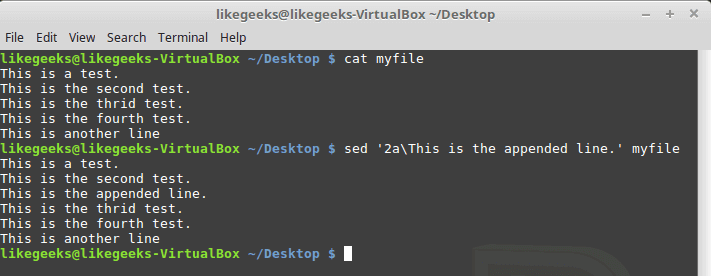
The same flags are used but with a location of insertion or appending.
Modifying Lines
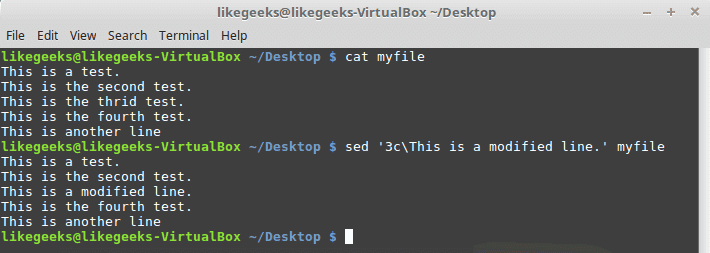
To modify a specific line, you can use the (c) flag like this:
sed '3c\This is a modified line.' myfile
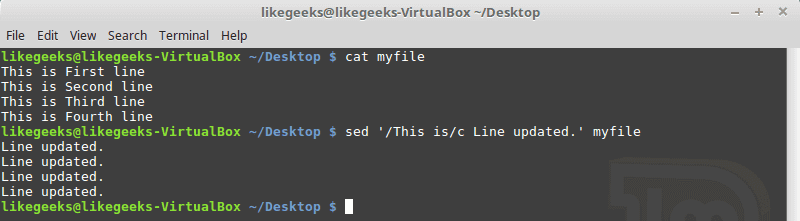
You can use a regular expression pattern and all lines match that pattern will be modified.
sed '/This is/c Line updated.' myfile
Transform Characters
The transform flag (y) works on characters like this:
sed 'y/123/567/' myfile
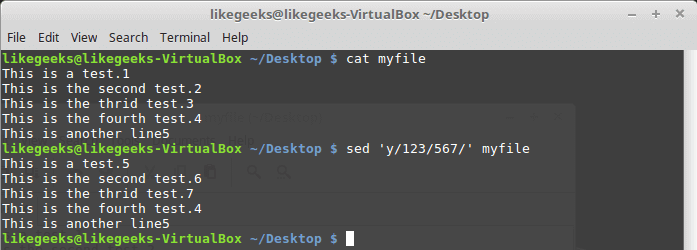
The transformation is applied to all data and cannot be limited to a specific occurrence.
Print Line Numbers
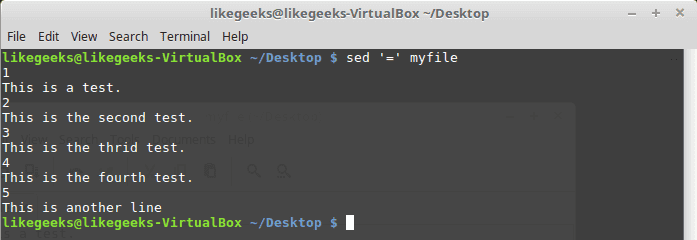
You can print line number using the (=) sign like this:
sed '=' myfile
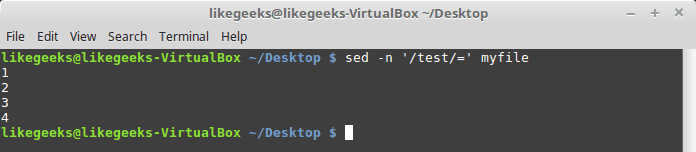
However, by using -n combined with the equal sign, the sed command displays the line number that contains matching.
sed -n '/test/=' myfile
Read Data From a File
You can use the (r) flag to read data from a file.
You can define a line number or a text pattern for the text that you want to read.
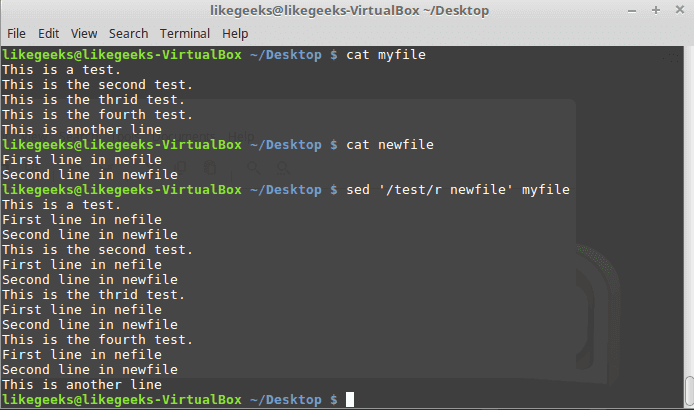
cat newfile
sed '3r newfile' myfile
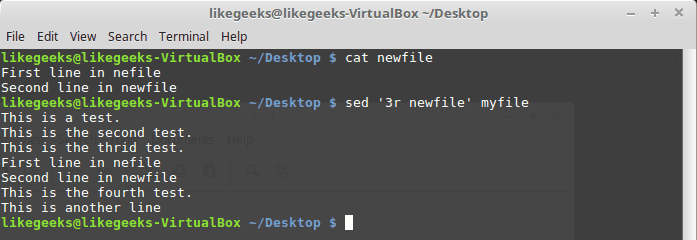
The content is just inserted after the third line as expected.
And this is using a text pattern:
sed '/test/r newfile' myfile
Cool right?
Useful Examples
We have a file that contains text with a placeholder and we have another file that contains the data that will be filled in that placeholder.
We will use the (r) and (d) flags to do the job.
The word DATA in that file is a placeholder for a real content which is stored in another file called data.
We will replace it with the actual content:
Sed '/DATA>/ {
r newfile
d}' myfile
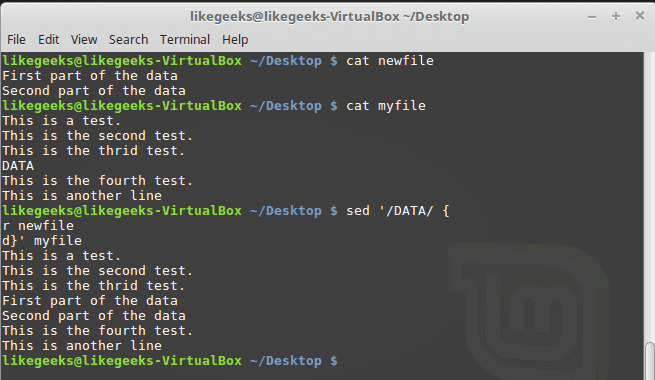
Awesome!! as you can see, the placeholder location is filled with the data from the other file.
This is just a very small intro about sed command. Actually, sed Linux command is another world by itself.
The only limitation is your imagination.
I hope you enjoy what’ve introduced today about the string manipulation using sed Linux command.
Thank you.