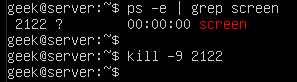
In this tutorial, we will talk about killing a process in Linux with multiple examples. In most cases, it’s as simple as typing “kill” command followed by the process ID (commonly abbreviated as PID). 
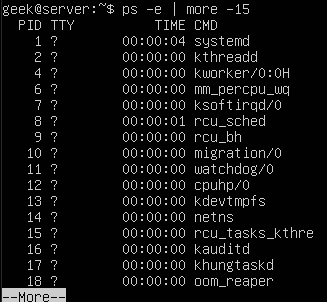
In the screenshot above, we’ve killed a process with the ID of 1813. If you are a Windows user, it may help to think of the ‘kill’ command as Linux’s equivalent of the ‘End task’ button inside of the Windows task manager. The “ps -e” command will list everything running on your system. Even with a minimal installation, the command will probably output more than 80 results, so it’s much easier to pipe the command to ‘grep’ or ‘more’.
ps -e | grep name-of-process
In the screenshot below, we check to see if SSH is running on the system.
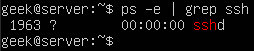
This also gives us the PID of the SSH daemon, which is 1963.
Pipe to ‘more’ if you want to look through your system’s running processes one-by-one.
You can also make use of the ‘top’ command in order to see a list of running processes. This is useful because it will show you how many system resources that each process is using.
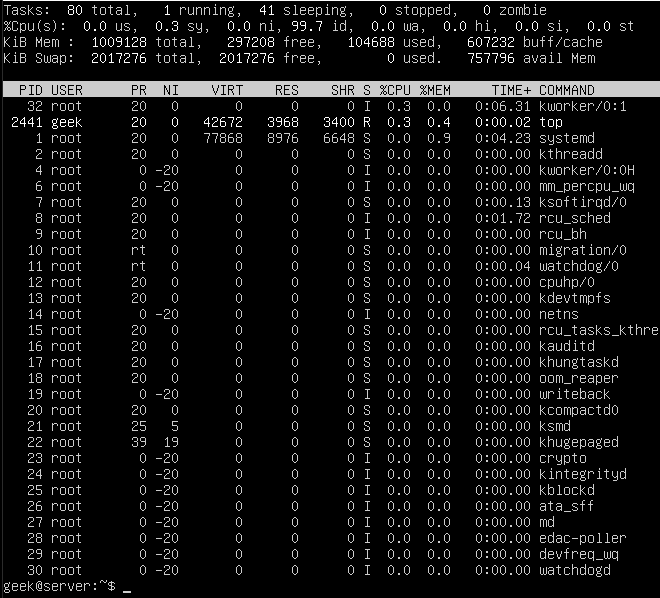
The PID, User, and name of the resource are all identified here, which is useful if you decide to kill any of these services later.
Pay attention to the %CPU and %MEM columns, because if you notice an unimportant process chewing up valuable system resources, it’s probably beneficial to kill it!
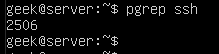
Another very efficient away of obtaining the corresponding process ID is to use the ‘pgrep’ command. The only argument you need to supply is the name (or part of the name) of the running process.
Here’s what it looks like when we search for SSH. As you can see, it returns a process ID of 2506.
Kill a process by PID
Now that we know the PID of the SSH daemon, we can kill the process with the kill command.
sudo kill 1963

You can issue a final ‘ps’ command, just to ensure that the process was indeed killed.
ps -e | grep ssh
The results come up empty, meaning that the process was shut down successfully. If you notice that the process is continuing to run – which should not normally happen – you can try sending a different kill signal to the process, as covered in the next session.
Note: It’s not always necessary to use ‘sudo’ or the root user account to end a process. In the former example, we were terminating the SSH daemon, which is run under the root user, therefore we must have the appropriate permissions to end the process.
Default signal sent by the kill command
By default, the kill command will send a SIGTERM signal to the process you specify.
This should allow the process to terminate gracefully, as SIGTERM will tell the process to perform its normal shutdown procedures – in other words, it doesn’t force the process to end abruptly.
This is a good thing because we want our processes to shut down the way they are intended.
Sometimes, though, the SIGTERM signal isn’t enough to kill a process. If you run the kill command and notice that the process is still running, the process may still be going through its shutdown process, or it may have become hung up entirely.
Force killing
To force the process to close and forego its normal shutdown, you can send a SIGKILL signal with the -9 switch, as shown here:
kill -9 processID
It can be tempting to always append the -9 switch on your kill commands since it always works. However, this isn’t the recommended best practice. You should only use it on processes that are hung up and refusing to shut down properly.
When possible, use the default SIGTERM signal. This will prevent errors in the long run, since it gives the process a chance to close its log files, terminate any lingering connections, etc.
Apart from the SIGTERM and SIGKILL signals, there is a slew of other signals that kill can send to processes, all of which can be seen with the -l switch.
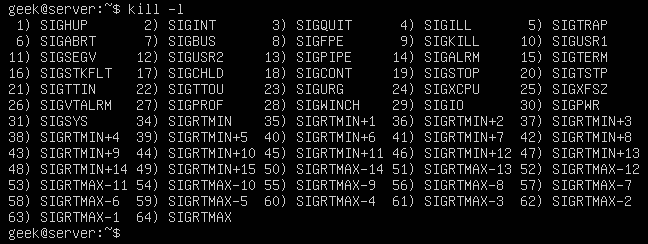
The numbers next to the names are what you would specify in your ‘kill’ command. For example, kill -9 is SIGKILL, just like you see in the screenshot above.
For everyday operations, SIGTERM and SIGKILL are probably the only signals you will never need to use. Just keep the others in mind in case you have a weird circumstance where a process recommends terminating it with a different signal.
How to kill all processes by name?
You can also use the name of a running process, rather than the PID, with the pkill command. But beware, this will terminate all the processes running the under the specified name, since kill won’t know which specific process you are trying to terminate.
pkill name-of-process
Check out the example below where we terminate five processes with a single pkill command.
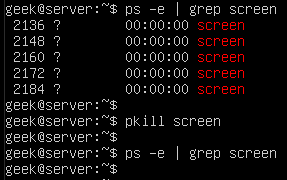
In this example, we had wanted to only terminate one of those screen sessions, it would’ve been necessary to specify the PID and use the normal ‘kill’ command. Otherwise, there is no way to uniquely specify the process that we wish to end.
How to kill all processes by a user?
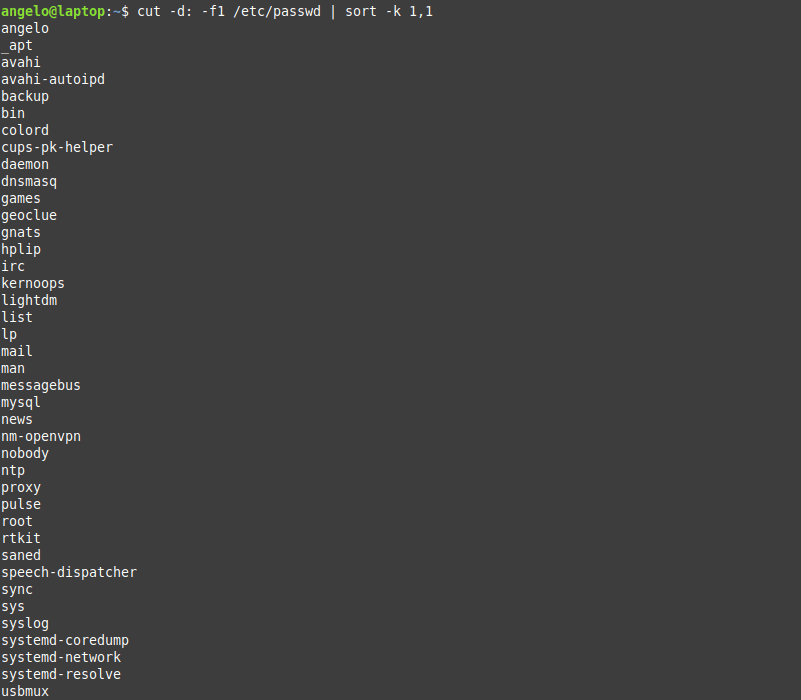
You can also use the pkill command to terminate all processes that are running by a Linux user. First, to see what processes are running under a specific user, use the ps command with a -u switch.
ps -u username
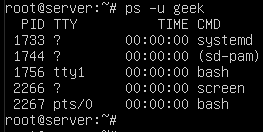
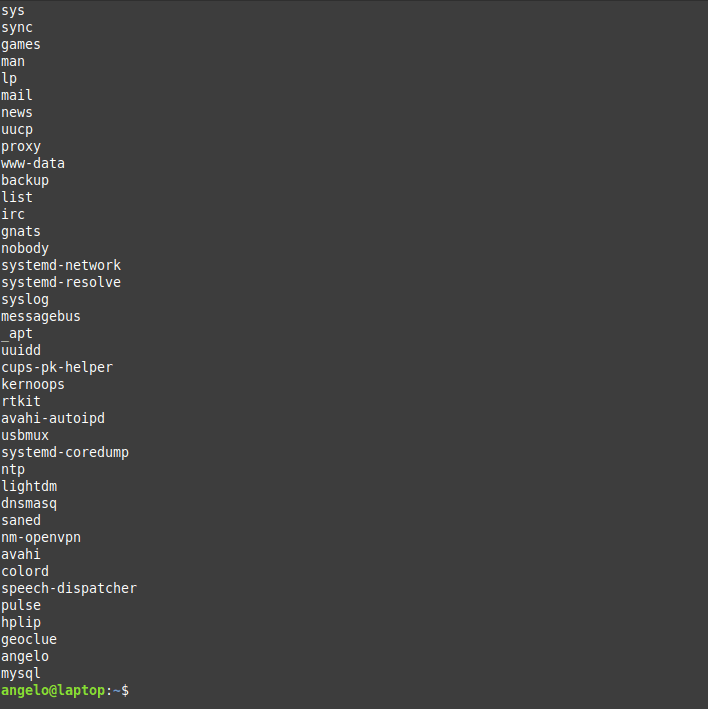
That screenshot shows us that there are currently 5 services running under the user ‘geek’. If you need to terminate all of them quickly, you can do so with pkill.
pkill -u username
![]()
How to kill a nohup process?
The nohup process is killed in the same way as any other running process. Note that you can’t grep for “nohup” in the ps command, so you’ll need to search for the running process using the same methods as shown above.
In this example, we find a script titled ‘test.sh’ which has been executed with the nohup command. As you’ll see, finding and ending it is much the same as the examples above.
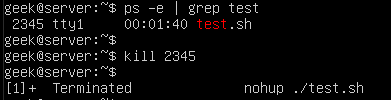
The only difference with the output is that we are notified that the process was terminated. That’s not part of kill, but rather a result from running the script in the background (the ampersand in this example) and being connected to the same tty from which the script was initiated.
nohup ./test.sh &
How to run a process in the background?
The kill command is an efficient way to terminate processes you have running in the background. You’ve already learned how to kill processes in this tutorial, but knowing how to run a process in the background is an effective combination for use with kill command.
You can append an ampersand (&) to your command in order to have it executed in the background. This is useful for commands or scripts that will take a while to execute, and you wish to do other tasks in the meantime.
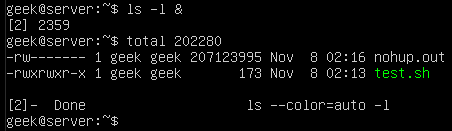
Here we have put a simple ‘ls’ command into the background. Since it’s the type of command which takes very little time to execute, we’re given more output about it finishing its job directly after.
The output in our screenshot says “Done”, meaning that the job in the background has completed successfully. If you were to kill the job instead, it would show “terminated” in the output.
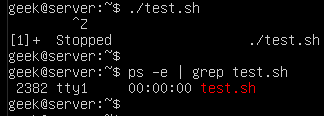
You can also move a job to the background by pressing Ctrl+Z on your keyboard. The ^Z in this screenshot indicates that Ctrl+Z was pressed and the test.sh script has been moved into the background.

You can see test.sh continuing to run in the background by issuing a ps command.
ps -e | grep test.sh
Using screen command
Another way to run a process in the background is to use the ‘screen’ command. This works by creating what basically amounts to a separate terminal window (or screen… hence the name).
Each screen that you create will be given its own process ID, which means that it’s an efficient way of creating background processes that can be later ended using the kill command.
Screen isn’t included on all Linux installs by default, so you may have to install it, especially if you’re not running a distribution meant specifically for servers.
On Ubuntu and Debian-based distributions, it can be installed with the following command:
sudo apt-get install screen
Once screen command is installed, you can create a new session by just typing ‘screen’.
screen
But, before you do that, it’s good to get in the habit of specifying names for your screens. That way, they are easy to look up and identify later. All you need in order to specify a name is the -S switch.
screen -S my-screen-name
Let’s make a screen called “testing” and then try to terminate it with the ‘kill’ command. We start like this:
![]()
After typing this command and pressing enter, we’re instantly taken to our newly created screen. This is where you could start the process that you wish to have running in the background.
This is especially handy if you are SSH’d into a server and need a process to continue running even after you disconnect.
With your command/script running, you can disconnect from the screen by pressing Ctrl+A, followed by D (release the Ctrl and A key before pressing the D key).
![]()
As you can see, screen command has listed the process ID as soon as we detached the screen. Of course, we can terminate this screen (and the command/script running inside of it), by using the kill command.
You can easily look up the process ID of your screen sessions by using this command:
screen -ls

If we hadn’t named our screen session by using the -S switch, only the process ID itself would be listed. To reattach to the any of the screens listed, you can use the -r switch:
screen -r name-of-screen
or
screen -r PID
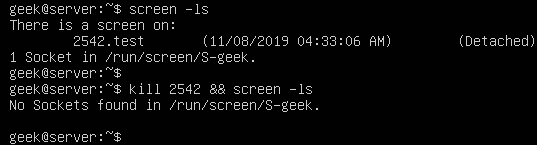
![]()
In the screenshot below, we are killing the screen session we created (along with whatever is being run inside of it), and then issuing another screen -ls command in order to verify that the process has indeed ended.
How to kill a background process?
In one of our examples in the previous section, we put our tesh.sh script to run in the background. Most background processes, especially simple commands, will terminate without any hassle.
However, just like any process, one in the background may refuse to shut down easily. Our test.sh script has a PID of 2382, so we’ll issue the following command:
kill 2383
In the screenshot, though, you’ll notice that the script has ignored our kill command:
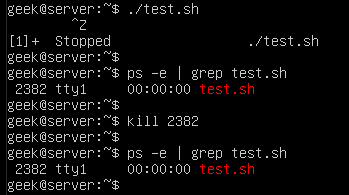
As we’ve learned already, kill -9 is the best way to kill a process that is hung up or refusing to terminate.

How to kill stopped processes?
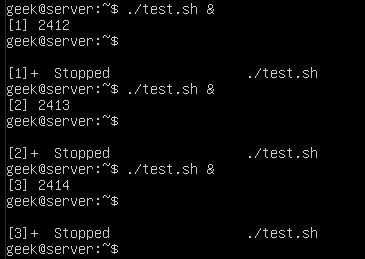
It can be useful to kill all your stopped background jobs at once if they have accumulated and are no longer useful to you. For the sake of example, we’re running three instances of our test.sh script in the background and they’ve been stopped:
./test.sh &
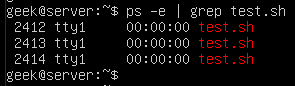
You can see these processes with the ps command:
ps -e | grep test.sh
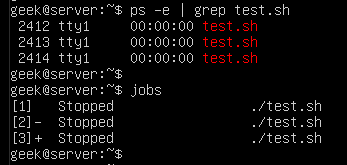
Or, to just get a list of all the stopped jobs on the system, you can run the jobs command:
jobs
The easiest way to kill all the stopped jobs is with the following command:
kill `jobs -ps`
Or use the -9 switch to make sure the jobs terminate immediately:
kill -9 `jobs -ps`

The jobs -ps command will list all jobs’ PIDs running in the background, which is why we’re able to combine its output with the kill command in order to end all the stopped processes.
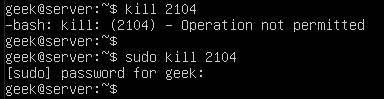
Kill operation not permitted
If you are getting an “operation not permitted” error when trying to kill a process, it’s because you don’t have the proper permissions. Either log in to the root account or use ‘sudo’ (on Debian distributions) before your kill command.
sudo kill PID
I hope you find the tutorial useful. Keep coming back.

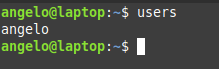
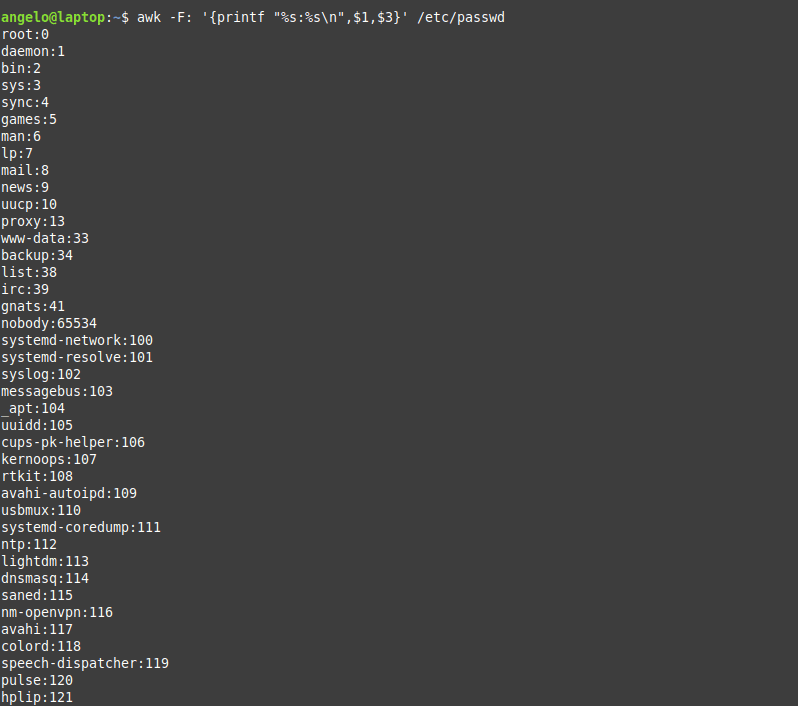
 In this post, you will learn about listing users in


 GNU/Linux altında çalışan pico editörünün bir benzetimi (emülatörü) olan
 AMD’nin resmi
  Bir veya daha fazla bilgisayar kullanarak işleri paralel olarak yürütmek için bir