Tag Archives | serve

How to Budget for Web Hosting

We’d all like to save money with shared hosting, but for some websites, VPS or even dedicated plans are unavoidable. If you do end up having to spring for a more advanced plan, it probably means your site is getting bigger and receiving more traffic – so the financial cost will be worth the rewards. But how can you plan for that financial cost, and minimize it as much as possible? To start, you need to know where your site is headed. To figure out the best budget for your web hosting plan, it’s important to first identify the specific goals that you have for your site. You don’t want to end up committing to a plan that doesn’t fit those goals, whether it’s too complex or not scalable enough.

Continue Reading →

What are your site goals?

To figure out the best budget for your web hosting plan, it’s important to first identify the specific goals that you have for your site. You don’t want to end up committing to a plan that doesn’t fit those goals, whether it’s too complex or not scalable enough.

If you’re aiming for your website to…

  • Attract a small following among family and friends
  • Serve as a point of contact for a local business
  • Promote an individual portfolio or CV

…then shared hosting ($2.75 – $15.00/month) will be more than sufficient. But if you want that website to:

  • Handle the traffic demands of a medium-sized business
  • Be secure enough to handle electronic card payments
  • Accommodate the files of a successful and active blog
  • Maintain good page speed and image loading times as traffic increases

…you’ll need to upgrade to VPS ($5 – $80/month).

The only websites that will need to shell out for a dedicated plan ($80 – $730/month) are:

  • Pages for companies with a huge, multinational audience that generates a lot of traffic
  • Sites with particularly large ecommerce demands, like storing lots of high-res product images

If you’re running a small website with only a few pages right now, but the goal is to eventually scale up and become a high-traffic, content-heavy platform, then it’s possible to keep that ambition while saving your money – after all, you can always upgrade to a VPS or dedicated plan later.

Basically, you can think of shared, VPS, and dedicated hosting as the respective options for small, medium, and large websites. Once you’ve chosen between these types, the real budgeting work begins.

Planning costs by the year

The most important factor in a web hosting budget is time commitment. When you sign up to a hosting plan, you’ll have the option to pay for anywhere between one month and four years in advance.

The incentive to pay for four years up front is that the price per month becomes much lower when you do so. For example, HostGator’s most basic shared plan costs $6.95/month when purchased for three years, $7.95/month for two years, and $8.95/month for one year. It costs $10.95 to purchase one month at a time.

In short, here’s how much you’d pay initially by plan, and how much you’d end up paying after three years:

By paying for a year up front rather than by the month, you’ll already save $24 after one year, and $72 after three years.

We’d recommend purchasing a plan for one year in advance. That way, you still save on the monthly price, but you’re not sacrificing the opportunity to reach a growth goal and upgrade your plan within a year or two.     

Most hosting providers offer money-back guarantee periods that last for the first 30 or so days after purchase, so regardless of how many years you commit to in advance, you’ll still get that initial window risk-free.

It’s also important to note that most hosting providers offer tempting introductory prices for the first purchase period, which then renew at a much higher rate.

For example, buying HostGator’s basic shared plan for one year costs $5.95/month the first year, and then renews at $8.95/month. To buy the same plan for three years costs $2.75/month for the first three years, and then renews at $6.95/month for the following three years.

Choosing a provider

You don’t have to pay top dollar for good service. There are plenty of cheap hosting providers that can support your site without breaking the bank.

If you’re looking for dirt cheap hosting, then Hostinger’s $0.80/month introductory shared price is a good place to start, as is iPage’s $1.99/month shared plan. But if you’re looking to get the most value for your money, then it’s worth taking a closer look.

We’ve talked about how most hosting providers offer introductory prices and free trial periods. But the top providers also have their differences. Firstly, you want to choose a provider that has a good reputation for your chosen hosting type.

For example, while DreamHost offers great features on its shared plans, its VPS plans don’t allow you root access, and you’d be better served elsewhere.

And while Hostinger’s shared plans are secure and user-friendly, it doesn’t offer any dedicated plans, which immediately limits your potential to scale.

Providers also differ in their more general strengths and weaknesses. If you value customer service above all, then DreamHost’s lack of phone support will be a major mark in your “cons” column. If uptime is your top priority, then HostGator’s 99.99% guarantee will be a big draw.

Additional costs

Saving money is important. But it’s also important to make room in your budget for the hosting features that matter most to you. Here are three add-ons that we think are worth paying for:

  1. Security tools
  2. Email
  3. Automated backups

The most important security cost you’ll incur is that of an SSL certificate. You can’t really host a successful website without this coveted padlock icon, because it’s an immediate signal to visitors that their data is safe.

Many hosting providers include a basic version of SSL for free on some plans, or you can up your game and purchase a premium SSL certificate for about $50. If you want to take security a step further, you can also budget for SiteLock security at about $2/month, which offers daily malware scans and increased protection from DDoS attacks.

Adding advanced email functionalities to your website will typically cost between $6 and $15/month. Many web hosts will let you purchase business accounts for G Suite or Office 365, which you can then use to set up addresses @yourdomain.com.

This is an especially attractive feature for anyone looking to host a business or eCommerce site.

You can always back up your site yourself. But if you have room in your budget for the convenience of automatic backups, most hosting providers offer this service for around $2/month.

The Wrap-Up

It’s important to have clear goals in mind when you choose a hosting plan. If you’re making a small blog to update family and friends, then there’s no need to overpay for a VPS plan.

But if you’re looking to get an eCommerce business off the ground, then the lack of security on a shared server will be too limiting. Once you know what you want from your site, it will be easy to select a plan that will give you the most value for your money.

Lastly, don’t forget to budget your time wisely, too! You’ll save the most money by purchasing a hosting plan for three or four years upfront, but for most of us, committing to one provider for that long is a lot to ask.

Take a look at monthly and yearly payment options before you make your decision.

Now that you know what to look out for, you’ll be able to get the most bang for your buck. Happy hosting!

0

Install, Configure, and Troubleshoot Linux Web Server

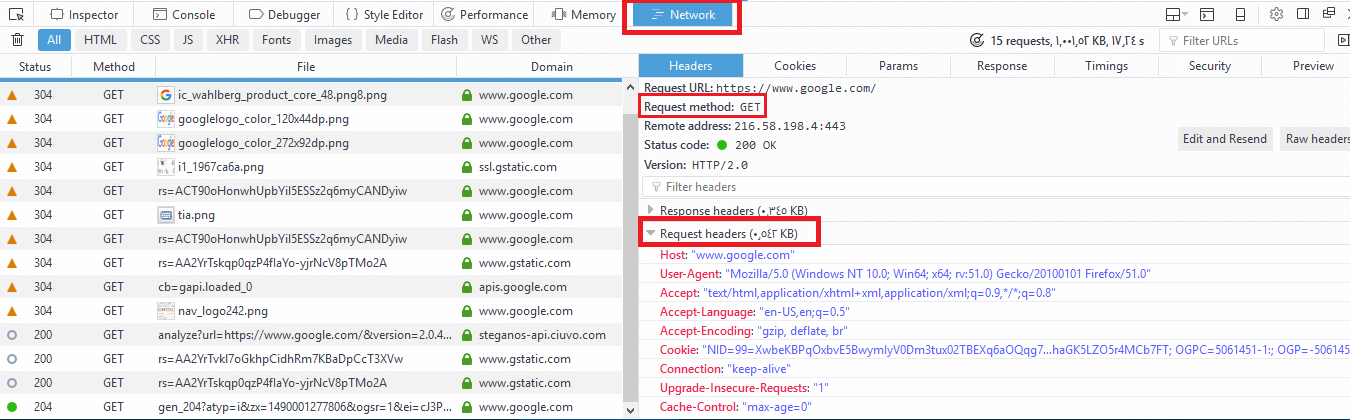
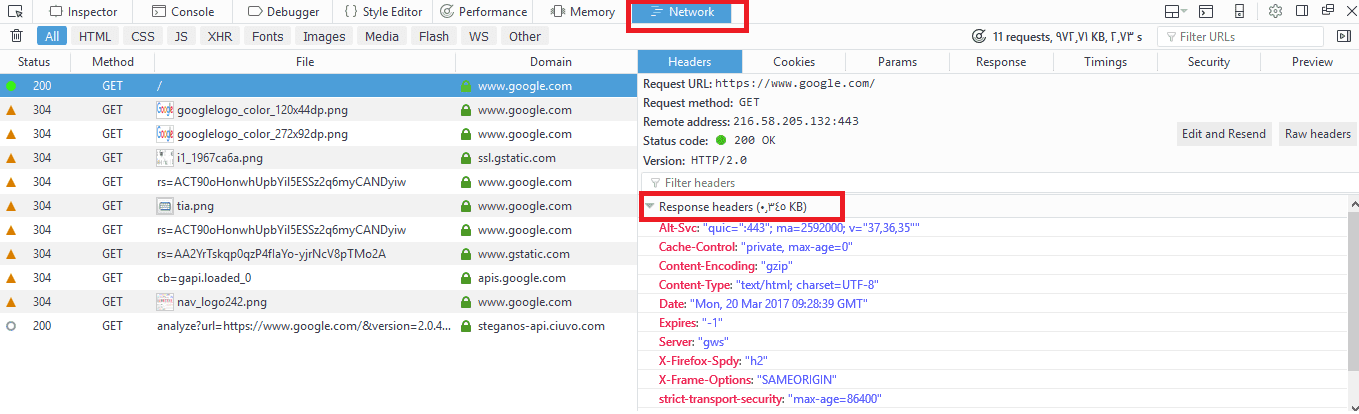
In this post, we will talk about Linux web server and how to install it and configure it to serve you content to others. A web server is a system that manipulates requests via HTTP protocol, you request a file from the server and it responds with the requested file, which might give you an idea that web servers are only used for the web. Actually, web servers can also be found embedded in devices such as printers, routers, when you open your router configuration page, there is a web server behind it. When you open the printer configuration page, there is also a web server behind it serving your requests, so web servers are important today because they are used everywhere. First, your browser sends a request to the server. The server takes the requested file or page from you and maps it to the corresponding file from the server. The server sends the file back to the browser with some information such as its MIME type, the length of the content and some other useful information.

Continue Reading →

Sometimes the requested file is a static page like HTML pages or dynamic pages like PHP, Java, Perl or any other server side language. For example, when you type www.yourDomain.com, the browser queries the DNS server about the IP address of the computer: www.yourDomain.com. Once the browser gets the response from the DNS, it starts a TCP connection on port 80 and asks for the default web page, then this page is sent to you and that’s all.

Linux Webserver Implementations

There are many Linux web server implementations available for you to use:

  • Apache server
  • Nginx
  • Lighttpd
  • Apache Tomcat
  • Monkey HTTP Daemon (used especially for embedded systems)

There are more Linux web servers, but this list is the most used web servers.

The most used web servers are Apache and Nginx.

In this post, we will use Apache server for several reasons:

  • It is stable.
  • It is flexible.
  • It is secure.

We’ll install and configure Apache server on Linux, but at first, let’s review some of the basics of HTTP protocol basics.

Understanding HTTP

When you request a file or a page from a web server, the client at first connects to the server on port 80. After successful connection, the client then sends HTTP commands (also methods) to the server. This command includes a request header which includes information about the client.

To view these request headers in chrome, open chrome devtools, then open network panel and visit google.com and check the request headers, you should see something like this:

Linux Web Server Request Header

The request header also includes information about the client, like the user agent and the accepted formats.

Additional information may be sent with the request header. For example, if you click on a link that will open another website, the header will include the referral site.

After receiving the request header completely, the server responds with the requested file or page along with a response header.

The response header includes information about the received content, its type, and other information.

Linux Web Server response header

You can check the response headers from the browser network panel.

Install Apache Webserver

You can install Apache server on Red Hat based distros using the following command:

$ dnf -y httpd

Or if you are using a Debian-based distro, you can install it like this:

$ apt-get -y install apache2

The Apache web server service is called httpd on Red Hat based distros like CentOS, while it is called apache2 in Debian based distros.

If you are using a firewall like iptables, you should add a rule for port 80.

$ iptables -I INPUT 1 -m state --state NEW -m tcp -p tcp --dport 80 -j ACCEPT

Or if you are using firewalld, you can use the following command:

$ firewall-cmd --add-port=80/tcp

To start your service and enable it on boot:

$ systemctl start httpd

$ systemctl enable httpd

You can check if your service is running or not, using the following command:

$ systemctl status httpd

You can check if your service is running or not, using the following command:

$ systemctl status httpd

Now open your browser and visit http://localhost or http://[::1]/ if you are using IP v6 and if your installation goes well, you should see your HTML homepage.

Configuring Apache Webserver

You can add files to Apache in the /var/www/html directory for top-level pages.

Just remember to make sure that any files or directories placed in that directory are world-readable.

The default index page is index.html.

The Apache configuration files are in  /etc/httpd/conf/ directory.

On Debian based systems like Ubuntu, you may find it at  /etc/apache2/apache2.conf file.

We can’t discuss every option for Apache on a single post, but we will discuss the most important options.

You call them options or directives.

ServerRoot Option

This option specifies the configuration folder for Apache web server. On Red Hat based distros, the ServerRoot option is /etc/httpd/ directory. On Debian distros the ServerRoot option is /etc/apache2/.

ServerRoot /etc/httpd

Listen Option

This is the port that Apache web server will use to wait for incoming connections.

The default value for this option is 80 for nonsecure connections and 443 for secured connections.

If you have multiple IP addresses on your server, you can assign which IP should listen for connection using Listen option.

You can specify a different port other than 80, just make sure that it’s not in use.

You can run many HTTP servers on the same hardware every one on a unique port.

When a server runs on a non-standard port such as port 8080, it will require the port number to be explicitly stated like this:

www.example.com:8080

Listen 80

ServerName Option

This option specifies the hostname of the web server that appears to the visitors.

ServerName FQDN

DocumentRoot Option

This defines the path that will contain your files that will be served.

The default path is /var/www/html .

DocumentRoot /var/www/html

MaxRequestWorkers Option

This option sets the maximum number of concurrent connections that the server will receive.

LoadModule Option

This option is used to load modules into Apache web server.

There are a lot of Apache modules like these:

mod_cgid: This module is used to run CGI scripts using Apache web server.

mod_ssl: Provides secure connections via SSL and TLS protocols.

mod_userdir: This module allows you to serve content from users specific directories.

If you want to disable loading a specific module, you can comment the Load module line that contains that module.

Or if you use Debian based distros like Ubuntu, you can use these commands:

$ a2enmod modulename

This command to enable the module.

$ a2dismod modulename

This command to disable the module.

All these commands do is create a symlink under /etc/apache2/modsenabled  directory with the file that contains the module you want to enable. All files under this directory are included in Apache configuration by default, so any file will exist in this directory will be included.

And if you use a2dismod, the symlink will be removed.

If you enable or disable a module, you have to reload or restart apache web server.

LoadModule mod_cgid.so

Include Option

This option allows you to include other configuration files.

You can store all the configuration for different virtual domains, and Apache will include them at runtime.

Include filePath

UserDir option

This option specifies the directory that will contain the files that will be accessible via the web server. This directory is usually named public_html and its location in user’s home directory.

For example, if you have a user adam who wants to make his web content available via Apache web server.

First, we make a public_html folder under his home directory.

Then set the permission for the public_html folder:

$ chmod 644 public_html

Now if we put an index.html file, it will be accessible via the browser like this:

http://YOURHOSTNAME/~adam

UserDir public_html

Alias Option

This option specifies the location of the files that are outside the DocumentRoot location and need to be served by the Apache web server.

Like you have files outside DocumentRoot and you want them to be available to the visitors.

Alias URL_Path Actual_Path

ErrorLog Option

This option specifies the error log file for Apache web server.

ErrorLog /var/log/httpd/error_log

VirtualHost Option

This option allows you to host multiple websites on the same server.

The idea is that the content is served based on the requested hostname.

To setup a virtual host for the host www.example.com. First, create a VirtualHost option in /etc/httpd/conf/httpd.conf file.

And specify the DocumentRoot and ServerName like this:

ServerAdmin [email protected]

DocumentRoot /home/adam/public_html

ServerName www.example.com

ErrorLog /var/log/users/adam/error_log

</VirtualHost>

Keep in mind that the ServerName option must be resolvable via DNS.

These are the most used Apache options.

Virtual Host Types

There are two types of virtual hosts that you can define in Apache web server:

  • Name-based virtual hosts
  • IP-based virtual hosts

The NameVirtualHost directive defines which addresses can be virtual hosts; the asterisk (*) means any name or address on this server. You can write them like this:

NameVirtualHost *
<VirtualHost *>
ServerName www.example.com
DocumentRoot “/home/user1/public_html/”
</VirtualHost>
<VirtualHost *>
ServerName www.example2.com
DocumentRoot “/ home/user2/public_html/”
</VirtualHost>

If you have more than one IP address and you want to use SSL certificate, the website must be on a dedicated IP address. You can write IP-based virtual hosts like this:

<VirtualHost 192.168.1.2>
ServerName www.example.com
DocumentRoot “/home/user1/public_html/”
</VirtualHost>
<VirtualHost 192.168.1.3>
ServerName www.example2.com
DocumentRoot “/ home/user2/public_html/”
</VirtualHost>

Apache Process Ownership

We know from the Linux process management that each process inherits its permissions of its parent process.

This fact is true for all processes except for applications with the SETUID bit set, they inherit permissions from the owner, not the parent process. A good example is the /bin/su.

If a normal user runs /bin/su program, it does not inherit the permission from adam, but it acts as a root user running it.

Since Apache web server needs to bind port 80, and this needs root privileges.

After binding to port 80, Apache can run as a normal user and read only files that have permissions to read them.

Based on the Linux distro you use, the user could be one of the following:

nobody, www, apache, www-data, or daemon.

I delayed introducing two more options for apache till reaching that point.

User Option

This specifies the user ID which the web server will use to answer requests.

User wwwdata

Group Option

This specifies the group that Apache web server will use to read files.

Group wwwdata

Security is very important for sites that use executable scripts such as CGI or PHP scripts.

The use that you will use will have permission to read and write the content of all sites on the server. But we want to ensure that only the members of a particular site can read their own site only.

This is very important because if a site got compromised, the attacker will be able to read all files since the apache user has permission to do that.

So how to solve this problem?

suEXEC Support

A popular method is to use suEXEC. suEXEC is a program that runs with root permissions and makes CGI programs run as the user and group IDs of a specific user, not the Apache server user.

You can specify the user on each virtual host like this:

<VirtualHost www.example.com>

SuExecUserGroup adam adamGroup

</VirtualHost>

Just that simple.

Apache Authentication

You may want to restrict some parts to specific visitors. It’s like a password protected directory.

In Apache, you can store authentication information file called .htpasswd file.

You can use the htpasswd command to do that.

First, create the .htpasswd file using the htpasswd command:

$ htpasswd -c /home/adam/.htpassswd myuser

The -c option is needed the first time you run htpasswd, but when you need to add more users you shouldn’t use -c because it will overwrite the file.

Then create a .htaccess file in the public_html folder and write the following:

<Location /vip>

AuthName "test"

AuthType Basic

AuthUserFile /home/adam/.htpasswd

Order deny,allow

require valid-user

</Location>

AuthName is required, you can use any string you want.

AuthType Basic says that you’re using htpasswd style user file.

AuthUserFile points to the file that contains the generated password from htpasswd command.

The Order line indicates that Apache must deny access by default, and only allow access for users specified in the htpasswd file.

The require directive means any user in the .htpasswd file is allowed.

Troubleshooting Apache Webserver

If you modify the httpd.conf file and restart or reload Apache web server and it did not work, then you have typed a wrong configuration, however, this is not the only case that you need to troubleshoot Apache, you may look at the apache logs to see how the service works so you can diagnose the problem and solve it.

The two main log files for apache are error_log and access_log files.

You can find these files in /var/log/httpd/  directory in Red Hat based distros, or in /var/log/apache2/  directory if you are using Debian based distros.

The access_log file contains every request to Apache web server with the details about client requested that resource.

The error_log file contains errors of Apache web server.

You can use tail command to watch the log file:

$ tail -f /var/log/httpd/error_log

I recommend you to review the Linux syslog server to know more about logging.

I hope you find working with Linux web server easy and interesting. Keep coming back.

Thank you.

likegeeks.com

0