 In this tutorial, we will cover the cURL command in Linux. Follow along as we guide you through the functions of this powerful utility with examples to help you understand everything it’s capable of. The cURL command is used to download or upload data to a server, using one of its 20+ supported protocols. This data could be a file, email message, or web page. cURL is an ideal tool for interacting with a website or API, sending requests and displaying the responses to the terminal or logging the data to a file. Sometimes it’s used as part of a larger script, handing off the retrieved data to other functions for processing. Since cURL can be used to retrieve files from servers, it’s often used to download part of a website. It performs this function well, but sometimes the wget command is better suited for that job. We’ll go over some of the differences and similarities between wget and cURL later in this article. We’ll show you how to get started using cURL in the sections below.
Download a file
The most basic command we can give to cURL is to download a website or file. cURL will use HTTP as its default protocol unless we specify a different one. To download a website, just issue this command:
curl http://www.google.com
Of course, enter any website or page that you want to retrieve.

Doing a basic command like this with no extra options will rarely be useful, because this only tells cURL to retrieve the source code of the page you’ve provided.
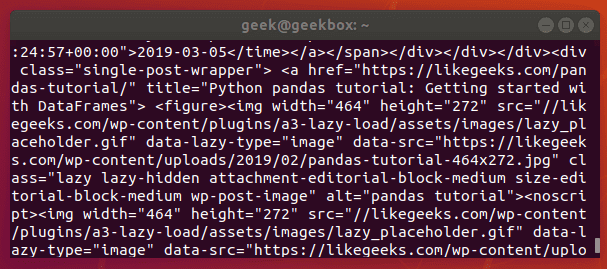
When we ran our command, our terminal is filled with HTML and other web scripting code – not something that is particularly useful to us in this form.
Let’s download the website as an HTML document instead, that way the content can be displayed. Add the –output option to cURL to achieve this.
curl www.likegeeks.com --output likegeeks.html
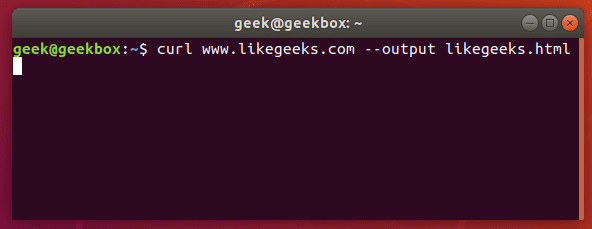
Now the website we downloaded can be opened and displayed in a web browser.

If you’d like to download an online file, the command is about the same. But make sure to append the –output option to cURL as we did in the example above.
If you fail to do so, cURL will send the binary output of the online file to your terminal, which will likely cause it to malfunction.
Here’s what it looks like when we initiate the download of a 500KB word document.
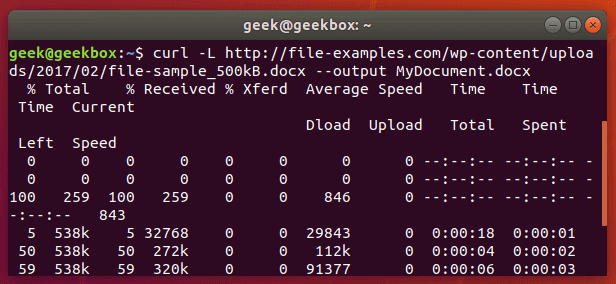
The word document begins to download and the current progress of the download is shown in the terminal. When the download completes, the file will be available in the directory we saved it to.
In this example, no directory was specified, so it was saved to our present working directory (the directory from which we ran the cURL command).
Also, did you notice the -L option that we specified in our cURL command? It was necessary in order to download this file, and we go over its function in the next section.
Follow redirect
If you get an empty output when trying to cURL a website, it probably means that the website told cURL to redirect to a different URL. By default, cURL won’t follow the redirect, but you can tell it to with the -L switch.
curl -L www.likegeeks.com
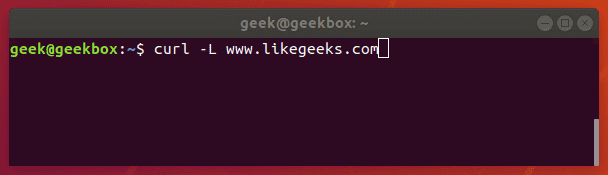
In our research for this article, we found it was necessary to specify the -L on a majority of websites, so be sure to remember this little trick. You may even want to append it to the majority of your cURL commands by default.
Stop and resume download
If your download gets interrupted, or if you need to download a big file but don’t want to do it all in one session, cURL provides an option to stop and resume the transfer.
To stop a transfer manually, you can just end the cURL process the same way you’d stop almost any process currently running in your terminal, with a ctrl+c combination.

Our download has begun, but was interrupted with ctrl+c, now let’s resume it with the following syntax:
curl -C - example.com/some-file.zip --output MyFile.zip
The -C switch is what resumes our file transfer, but also notice that there is a dash (-) directly after it. This tells cURL to resume the file transfer, but to first look at the already downloaded portion in order to see the last byte downloaded and determine where to resume.
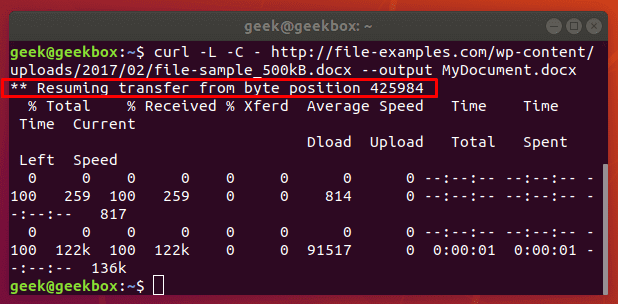
Our file transfer was resumed and then proceeded to finish downloading successfully.
Specify timeout
If you want cURL to abandon what it’s doing after a certain amount of time, you can specify a timeout in the command. This is especially useful because some operations in cURL don’t have a timeout by default, so one needs to be specified if you don’t want it getting hung up indefinitely.
You can specify a maximum time to spend executing a command with the -m switch. When the specified time has elapsed, cURL will exit whatever it’s doing, even if it’s in the middle of downloading or uploading a file.
cURL expects your maximum time to be specified in seconds. So, to timeout after one minute, the command would look like this:
curl -m 60 example.com
Another type of timeout that you can specify with cURL is the amount of time to spend connecting. This helps make sure that cURL doesn’t spend an unreasonable amount of time attempting to contact a host that is offline or otherwise unreachable.
It, too, accepts seconds as an argument. The option is written as –connect-timeout.
curl --connect-timeout 60 example.com
Using a username and a password
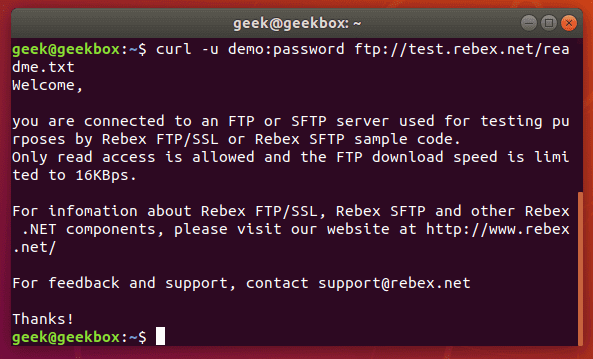
You can specify a username and password in a cURL command with the -u switch. For example, if you wanted to authenticate with an FTP server, the syntax would look like this:
curl -u username:password ftp://example.com
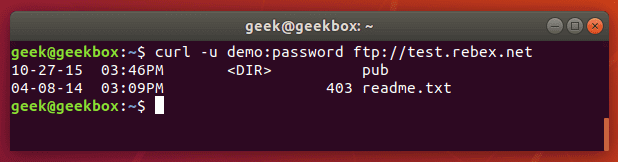
You can use this with any protocol, but FTP is frequently used for simple file transfers like this.
If we wanted to download the file displayed in the screenshot above, we just issue the same command but use the full path to the file.
curl -u username:password ftp://example.com/readme.txt
Use proxies
It’s easy to direct cURL to use a proxy before connecting to a host. cURL will expect an HTTP proxy by default, unless you specify otherwise.
Use the -x switch to define a proxy. Since no protocol is specified in this example, cURL will assume it’s an HTTP proxy.
curl -x 192.168.1.1:8080 http://example.com
This command would use 192.168.1.1 on port 8080 as a proxy to connect to example.com.
You can use it with other protocols as well. Here’s an example of what it’d look like to use an HTTP proxy to cURL to an FTP server and retrieve a file.
curl -x 192.168.1.1:8080 ftp://example.com/readme.txt
cURL supports many other types of proxies and options to use with those proxies, but expanding further would be beyond the scope of this guide. Check out the cURL man page for more information about proxy tunneling, SOCKS proxies, authentication, etc.
Chunked download large files
We’ve already shown how you can stop and resume file transfers, but what if we wanted cURL to only download a chunk of a file? That way, we could download a large file in multiple chunks.
It’s possible to download only certain portions of a file, in case you needed to stay under a download cap or something like that. The –range flag is used to accomplish this.
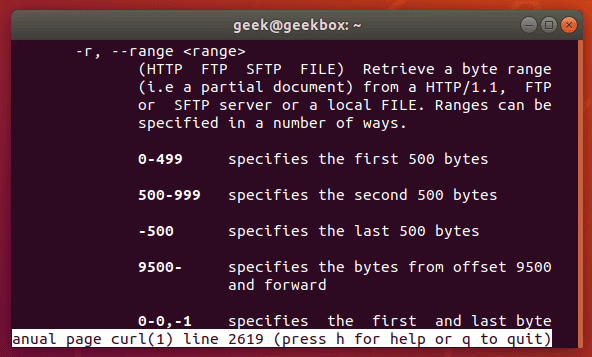
Sizes must be written in bytes. So if we wanted to download the latest Ubuntu .iso file in 100 MB chunks, our first command would look like this:
curl --range 0-99999999 http://releases.ubuntu.com/18.04/ubuntu-18.04.3-desktop-amd64.iso ubuntu-part1
The second command would need to pick up at the next byte and download another 100 MB chunk.
curl --range 0-99999999 http://releases.ubuntu.com/18.04/ubuntu-18.04.3-desktop-amd64.iso ubuntu-part1
curl --range 100000000-199999999 http://releases.ubuntu.com/18.04/ubuntu-18.04.3-desktop-amd64.iso ubuntu-part2
Repeat this process until all the chunks are downloaded. The last step is to combine the chunks into a single file, which can be done with the cat command.
cat ubuntu-part? > ubuntu-18.04.3-desktop-amd64.iso
Client certificate
To access a server using certificate authentication instead of basic authentication, you can specify a certificate file with the –cert option.
curl --cert path/to/cert.crt:password ftp://example.com
cURL has a lot of options for the format of certificate files.
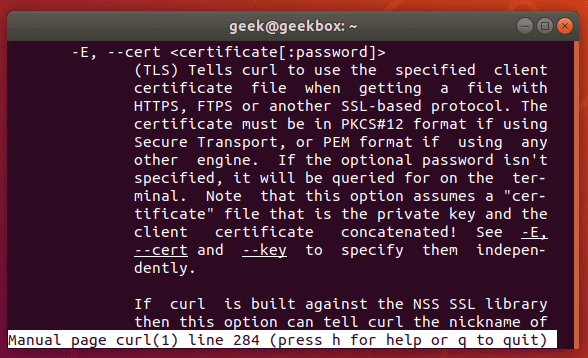
There are more certificate related options, too: –cacert, –cert-status, –cert-type, etc. Check out the man page for a full list of options.
Silent cURL
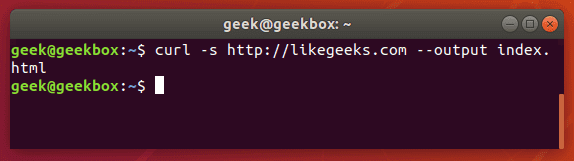
If you’d like to suppress cURL’s progress meter and error messages, the -s switch provides that feature. It will still output the data you request, so if you’d like the command to be 100% silent, you’d need to direct the output to a file.
Combine this command with the -O flag to save the file in your present working directory. This will ensure that cURL returns with 0 output.
curl -s -O http://example.com
Alternatively, you could use the –output option to choose where to save the file and specify a name.
curl -s http://example.com --output index.html
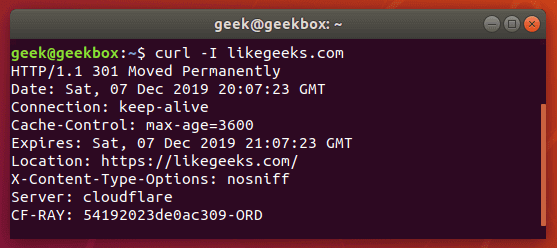
Get headers
Grabbing the header of a remote address is very simple with cURL, you just need to use the -I option.
curl -I example.com
If you combine this with the –L option, cURL will return the headers of every address that it’s redirected to.
curl -I -L example.com
Multiple headers
You can pass headers to cURL with the -H option. And to pass multiple headers, you just need to use the -H option multiple times. Here’s an example:
curl -H 'Connection: keep-alive' -H 'Accept-Charset: utf-8 ' http://example.com
Post (upload) file
POST is a common way for websites to accept data. For example, when you fill out a form online, there’s a good chance that the data is being sent from your browser using the POST method. To send data to a website in this way, use the -d option.
curl -d 'name=geek&location=usa' http://example.com
To upload a file, rather than text, the syntax would look like this:
curl -d @filename http://example.com
Use as many -d flags as you need in order to specify all the different data or filenames that you are trying to upload.
You can the -T option if you want to upload a file to an FTP server.
curl -T myfile.txt ftp://example.com/some/directory/
Send an email
Sending an email is simply uploading data from your computer (or another device) to an email server. Since cURL is able to upload data, we can use it to send emails. There are a slew of options, but here’s an example of how to send an email through an SMTP server:
curl smtp://mail.example.com --mail-from [email protected] --mail-rcpt [email protected] --upload-file email.txt
Your email file would need to be formatted correctly. Something like this:
cat email.txt
From: Web Administrator <[email protected]>
To: John Doe <[email protected]>
Subject: An example email
Date: Sat, 7 Dec 2019 02:10:15
John,
Hope you have a great weekend.
-Admin
As usual, more granular and specialized options can be found in the man page of cURL.
Read email message
cURL supports IMAP (and IMAPS) and POP3, both of which can be used to retrieve email messages from a mail server.
Login using IMAP like this:
curl -u username:password imap://mail.example.com
This command will list available mailboxes, but not view any specific message. To do this, specify the UID of the message with the –X option.
curl -u username:password imap://mail.example.com -X 'UID FETCH 1234'
Difference between cURL and wget
Sometimes people confuse cURL and wget because they’re both capable of retrieving data from a server. But this is the only thing they have in common.
We’ve shown in this article what cURL is capable of. wget provides a different set of functions. wget is the best tool for downloading websites and is capable of recursively traversing directories and links to download entire sites.
For downloading websites, use wget. If using some protocol other than HTTP or HTTPS, or for uploading files, use cURL. cURL is also a good option for downloading individual files from the web, although wget does that fine, too.
I hope you find the tutorial useful. Keep coming back.