What is SSH port forwarding?
To put it simply, SSH port forwarding involves establishing an SSH tunnel between two or more systems and then configuring the systems to transmit a specified type of traffic through that connection.
There are a few different things you can do with this: local forwarding, remote forwarding, and dynamic port forwarding. Each configuration requires its own steps to setup, so we will go over each of them later in the tutorial.
Local port forwarding is used to make an external resource available on the local network. An SSH tunnel is established to a remote system, and traffic from the local network can use that tunnel to transmit data back and forth, accessing the remote system and network as if it was a part of the local network.
Remote port forwarding is the exact opposite. An SSH tunnel is established but the remote system is able to access your local network.
Dynamic port forwarding sets up a SOCKS proxy server. You can configure applications to connect to the proxy and transmit all data through it. The most common use for this is for private web browsing or to make your connection seemingly originate from a different country or location.
SSH port forwarding can also be used to setup a virtual private network (VPN). You’ll need an extra program for this called sshuttle. We cover the details later in the tutorial.
Why use SSH port forwarding?
Since SSH creates encrypted connections, this is an ideal solution if you have applications that transmit data in plaintext or use an unencrypted protocol. This holds especially true for legacy applications.
It’s also popular to use it for connecting to a local network from the outside. For example, an employee using SSH tunnels to connect to a company’s intranet.
You may be thinking this sounds like a VPN. The two are similar, but creating ssh tunnels is for specific traffic, whereas VPNs are more for establishing general connections.
SSH port forwarding will allow you to access remote resources by just establishing an SSH tunnel. The only requirement is that you have SSH access to the remote system and, ideally, public key authentication configured for password-less SSHing.
How many sessions are possible?
Technically, you can specify as many port forwarding sessions as you’d like. Networks use 65,535 different ports, and you are able to forward any of them that you want.
When forwarding traffic, be cognizant of the services that use certain ports. For example, port 80 is reserved for HTTP. So you would only want to forward traffic on port 80 if you intend to forward web requests.
The port you forward on your local system doesn’t have to match that of the remote server. For example, you can forward port 8080 on localhost to port 80 on the remote host.
If you don’t care what port you are using on the local system, select one between 2,000 and 10,000 since these are rarely used ports. Smaller numbers are typically reserved for certain protocols.
Local forwarding
Local forwarding involves forwarding a port from the client system to a server. It allows you to configure a port on your system so that all connections to that port will get forwarded through the SSH tunnel.
Use the -L switch in your ssh command to specify local port forwarding. The general syntax of the command is like this:
ssh -L local_port:remote_ip:remote_port [email protected]
Check out the example below:
ssh -L 80:example1.com:80 example2.com
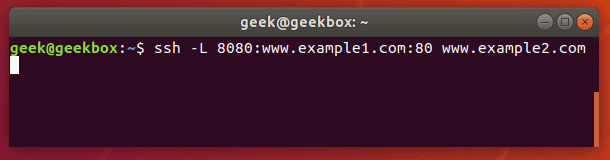
This command would forward all requests to example1.com to example2.com. Any user on this system that opens a web browser and attempts to navigate to example1.com will, in the background, have their request sent to example2.com instead and display a different website.
Such a command is useful when configuring external access to a company intranet or other private network resources.
Test SSH port forwarding
To see if your port forwarding is working correctly, you can use the netcat command. On the client machine (the system where you ran the ssh -L command), type the netcat command with this syntax:
nc -v remote_ip port_number
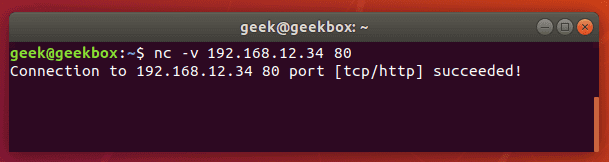
If the port is forwarded and data is able to traverse the connection successfully, netcat will return with a success message. If it doesn’t work, the connection will time out.
If you’re having trouble getting the port forwarding to work, make sure you’re able to ssh into the remote server normally and that you have configured the ports correctly. Also, verify that the connection isn’t being blocked by a firewall.
Persistent SSH tunnels (Using Autossh)
Autossh is a tool that can be used to create persistent SSH tunnels. The only prerequisite is that you need to have public key authentication configured between your systems, unless you want to be prompted for a password every time the connection dies and is reestablished.
Autossh may not be installed by default on your system, but you can quickly install it using apt, yum, or whatever package manager your distribution uses.
sudo apt-get install autossh
The autossh command is going to look pretty much identical to the ssh command we ran earlier.
autossh -L 80:example1.com:80 example2.com
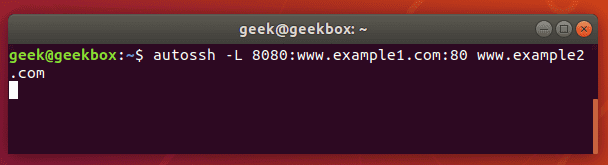
Autossh will make sure that tunnels are automatically re-established in case they close because of inactivity, remote machine rebooting, network connection being lost, etc.
Remote forwarding
Remote port forwarding is used to give a remote machine access to your system. For example, if you want a service on your local computer to be accessible by a system(s) on your company’s private network, you could configure remote port forwarding to accomplish that.
To set this up, issue an ssh command with the following syntax:
ssh -R remote_port:local_ip:local_port [email protected]
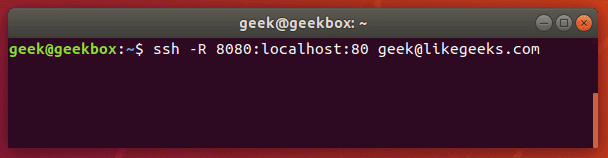
If you have a local web server on your computer and would like to grant access to it from a remote network, you could forward port 8080 (common http alternative port) on the remote system to port 80 (http port) on your local system.
ssh -R 8080:localhost:80 [email protected]
Dynamic forwarding
SSH dynamic port forwarding will make SSH act as a SOCKS proxy server. Rather than forwarding traffic on a specific port (the way local and remote port forwarding do), this will forward traffic across a range of ports.
If you have ever used a proxy server to visit a blocked website or view location-restricted content (like viewing stuff on Netflix that isn’t available in your country), you probably used a SOCKS server.
It also provides privacy, since you can route your traffic through a SOCKS server with dynamic port forwarding and prevent anyone from snooping log files to see your network traffic (websites visited, etc).
To set up dynamic port forwarding, use the ssh command with the following syntax:
ssh -D local_port [email protected]
So, if we wanted to forward traffic on port 1234 to our SSH server:
ssh -D 1234 [email protected]
Once you’ve established this connection, you can configure applications to route traffic through it. For example, on your web browser:
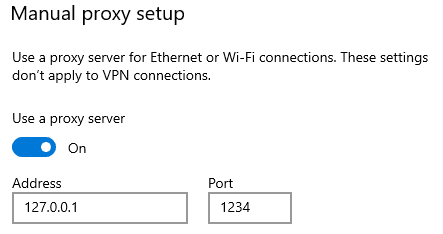
Type the loopback address (127.0.0.1) and the port you configured for dynamic port forwarding, and all traffic will be forwarded through the SSH tunnel to the remote host (in our example, the likegeeks.com SSH server).
Multiple forwarding
For local port forwarding, if you’d like to setup more than one port to be forwarded to a remote host, you just need to specify each rule with a new -L switch each time. The command syntax is like this:
ssh -L local_port_1:remote_ip:remote_port_1 -L local_port_2:remote_ip:remote_port2 [email protected]
For example, if you want to forward ports 8080 and 4430 to 192.168.1.1 ports 80 and 443 (HTTP and HTTPS), respectively, you would use this command:
ssh -L 8080:192.168.1.1:80 -L 4430:192.168.1.1:443 [email protected]
For remote port forwarding, you can setup more than one port to be forwarded by specifying each new rule with the -R switch. The command syntax is like this:
ssh -R remote_port1:local_ip:local_port1 remote_port2:local_ip:local_port2 [email protected]
List port forwarding
You can see what SSH tunnels are currently established with the lsof command.
lsof -i | egrep '\<ssh\>'

In this screenshot, you can see that there are 3 SSH tunnels established. Add the -n flag to have IP addresses listed instead of resolving the hostnames.
lsof -i -n | egrep '\<ssh\>'

Limit forwarding
By default, SSH port forwarding is pretty open. You can freely create local, remote, and dynamic port forwards as you please.
But if you don’t trust some of the SSH users on your system, or you’d just like to enhance security in general, you can put some limitations on SSH port forwarding.
There are a couple of different settings you can configure inside the sshd_config file to put limitations on port forwarding. To configure this file, edit it with vi, nano, or your favorite text editor:
sudo vi /etc/ssh/sshd_config
PermitOpen can be used to specify the destinations to which port forwarding is allowed. If you only want to allow forwarding to certain IP addresses or hostnames, use this directive. The syntax is as follows:
PermitOpen host:port
PermitOpen IPv4_addr:port
PermitOpen [IPv6_addr]:port
AllowTCPForwarding can be used to turn SSH port forwarding on or off, or specify what type of SSH port forwarding is permitted. Possible configurations are:
AllowTCPForwarding yes #default setting
AllowTCPForwarding no #prevent all SSH port forwarding
AllowTCPForwarding local #allow only local SSH port forwarding
AllowTCPForwarding remote #allow only remote SSH port forwarding
To see more information about these options, you can check out the man page:
man sshd_config
Low latency
The only real problem that arises with SSH port forwarding is that there is usually a bit of latency. You probably won’t notice this as an issue if you’re doing something minor, like accessing text files or small databases.
The problem becomes more apparent when doing network intensive activities, especially if you have port forwarding set up as a SOCKS proxy server.
The reason for the latency is because SSH is tunneling TCP over TCP. This is a terribly inefficient way to transfer data and will result in slower network speeds.
You could use a VPN to prevent the issue, but if you are determined to stick with SSH tunnels, there is a program called sshuttle that corrects the issue. Ubuntu and Debian-based distributions can install it with apt-get:
sudo apt-get install sshuttle
If you package manager on your distribution doesn’t have sshuttle in its repository, you can clone it from GitHub:
git clone https://github.com/sshuttle/sshuttle.git
cd sshuttle
./setup.py install
Setting up a tunnel with sshuttle is different from the normal ssh command. To setup a tunnel that forwards all traffic (akin to a VPN):
sudo sshuttle -r user@remote_ip -x remote_ip 0/0 -vv
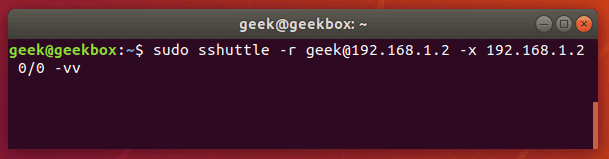
Break the connection with a ctrl+c key combination in the terminal. Alternatively, to run the sshuttle command as a daemon, add the -D switch to your command.
Want to make sure that the connection was established and the internet sees you at the new IP address? You can run this curl command:
curl ipinfo.io
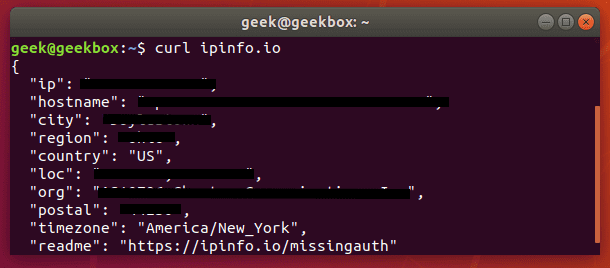
I hope you find the tutorial useful. Keep coming back.



 Ubuntu Linux topluluğu tarafından çıkarılan özgür ve bağımsız bir dergi olan Full Circle Magazine‘in Weekly News’in 160. sayısı duyuruldu. Yeni sayı; Zorin OS 15.1 çıktı, Firefox 71 artık desteklenen tüm Ubuntu sürümlerinde kullanıma hazır, KDE’nin Aralık 2019 uygulama güncellemesi, Oracle Virtualbox 6.1 kullanıma sunuldu, Microsoft Teams artık Linux için hazır, DXVK bakım moduna giriyor gibi dolu bir içerikle geliyor. Dergide ayrıca; haberler, hikayem, günlük yürüyüş, sorular ve cevaplar, bulmaca gibi bölümler de bulunuyor. Full Circle Magazine Weekly News 160 içeriğine ilişkin olarak buradan yararlanabilirsiniz.
 In this tutorial, we will cover
  İlkokuldan üniversiteye kadar tüm eğitim seviyelerinde kullanılabilen yazılımlarla çalışan ve
  Penetrasyon testleri ve güvenlik araştırmacıları için tasarlanmış
  Gelişmiş yenilikçi özellikler sunan, buna karşın, geleneksel kullanıcı
  Wine’in 5.0-RC3 sürümünün
  MPlayer ve mplayer2 tabanlı bir