 Online security is a major topic of discussion nowadays, with so many threats to your privacy (and even livelihood in some cases). Thanks to the ever-changing nature of technology, those dangers evolve right alongside it. So, while a truly “complete” guide isn’t achievable, we’ve done our best to cover all bases. Note that stuff like “use an antivirus” and “always update your software” should be common sense by now – so we won’t hammer on about those. HTTPS is the Secured version of the HyperText Transfer Protocol (HTTP) that lets you view pages in the first place. It uses SSL/TLS encryption to make sure the connection between you and the websites you browse remains private, including any passwords and sensitive data you transmit.
The Basics: HTTPS
HTTPS is the Secured version of the HyperText Transfer Protocol (HTTP) that lets you view pages in the first place. It uses SSL/TLS encryption to make sure the connection between you and the websites you browse remains private, including any passwords and sensitive data you transmit.
Despite all this fancy phrasing, it’s as simple as using websites that have a (usually) green padlock next to the address bar.
You don’t need to go to extreme lengths to have some basic protection. Just use HTTPS websites exclusively and you already have your first line of defense.
There’s even a browser add-on called HTTPS Everywhere from the Electronic Frontier Foundation that attempts to force an HTTPS connection where possible.
Websites that don’t use HTTPS are punished in search result rankings by Google, while Mozilla has been phasing out features for non-secure websites. All of this is an orchestrated effort by such organizations to encrypt the entire Internet and make it safer to browse.
Obviously, companies like Google don’t have the best track record when it comes to your online privacy – but we can appreciate them doing some good on every once in a while.
Their business model relies primarily on advertisements and mass data collection, so let’s see look at how those can affect you.
Ads Can Get You in Trouble
Let’s be honest, nobody really ‘likes’ ads – but we do love supporting content creators in any way we can. Don’t be in such a hurry to disable your ad-blocker on your favorite news site or while watching YouTube, though.
Why? Well, just take a look at what happened in 2016 to such major sites as the New York Times, BBC, and the NFL. In short, their ads contained a strain of ransomware that encrypted the victims’ hard drives in exchange for a Bitcoin ransom.
Keep in mind: these aren’t just some sketchy websites where you’d expect malware from a mile away.
The major stinger is that people didn’t even need to click the ads for the attack to happen, according to Malwarebytes. Sure, the targeted people had out of date software with security holes – but who’s to say when an “updated” program will be hit next?
If you haven’t already, be sure to get a good ad-blocking extension for your browser. Maybe a script-blocker as well, considering the number of malicious JavaScript attacks out there. A couple of great recommendations in the section below.
uBlock Origin and uMatrix
This duo of browser add-ons is a godsend to anyone who despises ads, pop-ups, auto-playing videos, and any other Internet nuisances.
They were both created by Raymond Hill, who not only works on and provides them for free, but he explicitly won’t accept donations of any kind.
Performance-wise, uBlock Origin (uBO) was benchmarked against AdBlock Plus (ABP) and it’s pretty clear who the winner is. Moreover, it has no “acceptable ads” program like ABP, where advertisers pay them to whitelist their ads.
Depending on which filter lists you use (and there are plenty of them), uBO will also block ad tracking scripts that, well, track your browsing habits.
uMatrix has much of the same functionality, though it also allows you to block anything a website might throw at you:
- Cookies
- Audio and video media, and even images
- Scripts, XHR, CSS elements, and frames
The fact that it stops requests from the domains you blacklist, across all websites, means you can get around Facebook’s “unavoidable” tracking.
You know; the thing that knows your browsing habits even if you don’t have a Facebook account – just because a page has a Like/Share button. Just a neat example of how to use uMatrix to preserve your privacy.
As a word of warning, this extension is geared towards advanced users. Don’t worry though; once you use it for several websites it’ll become second nature.
Everyone’s out for Your Data
We wish this was an exaggeration, but just look at how many people want your browsing habits for various reasons:
- Internet Service Providers have been selling your browsing and location data for a profit
- Government surveillance is at an all-time high, and more people are recognizing it since the Snowden revelations in 2013
- Hacker numbers are increasing, with over 4 billion records exposed in the first half of 2019 alone
- Almost 80% of websites have some form of ad tracking installed (which you can block with the previously mentioned add-ons)
It’s no wonder that nearly 25% of total Internet users use a Virtual Private Network (VPN) nowadays. If you’re not up to speed, a VPN encrypts (i.e. obfuscates) your data, making it unreadable to anybody who does not have the cryptographic key.
This means none of the four “usual suspects” above can see what you’re doing online. Moreover, any sensitive operations such as online banking, payments, and logging in to various services will be safe from hacking attempts.
On a minor downside, using a VPN tends to slow down your connection due to multiple factors – the distance between you and the server, the encryption/decryption process depends on your CPU power, and so on.
Fortunately, a super-fast VPN like ExpressVPN can help alleviate that. Since they have servers in 94 countries, it’s super easy to find one close to you – even when traveling abroad.
Free Wi-Fi = Free Hackers
Speaking of traveling – everyone loves using free Wi-Fi, especially on vacation. But have you ever noticed that your local café or that hotel you were staying at had two networks with the exact same name? Then you’ve most likely had an encounter with “Evil Twin” Wi-Fi hotspots.
Basically, hackers rely on peoples’ excitement for free stuff, so they create their own hotspots that mimic the real thing. Once you’re connected, your data is as good as stolen. Unless you use a VPN to encrypt it before leaving your device, that is.
In fact, this method was recommended by the Wi-Fi Alliance itself, since cyber criminals make it next to impossible to distinguish between a legitimate hotspot and a fake one. They even go as far as using the same SSID name and cloning the MAC address of the network.
Using a VPN is also a good idea even if you’re 100% sure that you’re connecting to the real thing, and the network is password-protected.
The reason being that both WPA2 and WPA3 (the current and latest Wi-Fi encryption protocols) suffer from security exploits that even an average-level hacker can profit from.
Take Care of Your Passwords
You wouldn’t think “password” would break the top 5 most common passwords, but it does. The top one is “123456” just for comparison. Your takeaway from here should be: never use weak passwords for your accounts. Oh, and don’t re-use them for others either.
Use a good password manager to help you create and store strong passwords that can’t be brute-forced in 5 minutes by a bored teenager and a video tutorial. As a side benefit, using a pass manager helps you avoid phishing scams.
Here’s how it goes down:
- Cybercriminals create a fake website that mimics legitimate services (PayPal, home banking, etc.)
- They send you an email saying you need to update your info and provide a link to their fake site
- Then they wait for you to type in your login info willingly
Fortunately, your password manager literally won’t input your login details because it can’t recognize the website as the correct one. Hackers are pretty crafty with their fakes nowadays, but this way they can’t rely on human error for their schemes.
Multi-Factor Authentication (MFA)
Many of these hacking attempts can be stopped in their tracks by simply having SMS two-factor authentication (2FA) enabled. It’s not the best choice, but as many security guides will tell you: “it’s better than nothing.”
The better option is to use an authenticator app such as Authy, Google Authenticator, and others. There are also hardware authenticator tokens that you can just plug in your USB or hold against your phone for the same effect.
Watch Out for Voicemail
What does voicemail have to do with online security? A lot, as it turns out. Since many people don’t bother to secure their voicemail account with a long password, hackers can simply use a brute-force attack to gain access to it.
Then, by using the password reset function on your accounts, they can ask for the reset tokens to be sent through a voice call. All they must do is make sure that call never reaches you and goes to voicemail instead. Voila, your account has been hacked.
Text-based 2FA won’t protect you in this case, so the best thing to do would be to disable your voicemail entirely. You may also call your own phone carrier and ask for assistance with this issue if yours isn’t on the list.
If you really want to keep voicemail around, you need to protect it with a long random password as we mentioned. iPhone users simply need to go to Settings > Phone > Change Voicemail Password.
Use Encrypted Email Services
We’ve mentioned Google’s anti-privacy practices in the beginning. And while they say they’ve stopped reading your emails, the Wall Street Journal says otherwise. Practices of this kind are all fairly well documented for these big tech giants – there’s no secret here.
So if you don’t like your private life spied on by some poorly paid contractor somewhere, consider switching to an encrypted email provider.
Since your emails are encrypted, not even the providers themselves can read them. Even if hackers somehow breached their databases, all they’d find is undecipherable gibberish.
ProtonMail is a good choice, but there are plenty of others out there if you need something different. Ultimately, they all allow you to keep your business between you and the recipient.
Dealing with Social Media
There is no expectation of privacy on social media. Don’t look at us – those words were from Facebook counsel Orin Snyder. While that’s a heavy-handed way of putting it, it’s 100% true.
The only logical way of dealing with your social accounts (if you need online privacy and security) is to delete them.
If you need to keep them for whatever reason, you can at least control how much data they have on you. To avoid being a victim to the next Cambridge Analytica, these are your only two options. Now, you can make it easier to clean up your socials with a couple of apps.
The first one is Jumbo for iOS and Android. Not only can it set all your privacy settings on most services to “maximum” without collecting any data, but it can also delete your Tweets (3200 at a time; that’s a Twitter limitation), old Facebook posts, and even Amazon Alexa recordings.
Another one is MyPermissions, which allows you to see what apps you’ve connected to your Facebook, Twitter, and other accounts.
They can be viewed, removed, and reported (if you find anything fishy) in a single interface. You can also change the data access privileges on the apps if you intend to keep them.
Don’t want yet another phone app? Social Post Book Manager (Chrome extension) and TweetDelete are great alternatives to delete those embarrassing college posts.

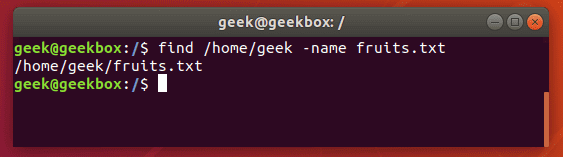
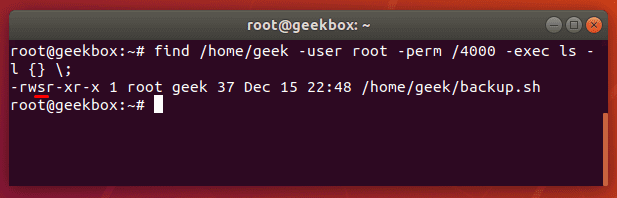
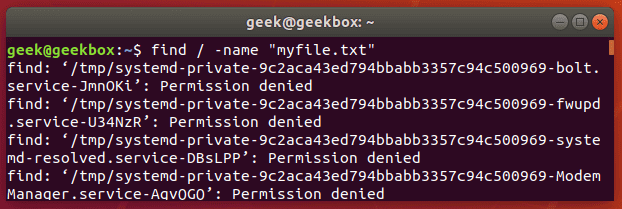
 When it comes to locating files or directories on your system, the find command on
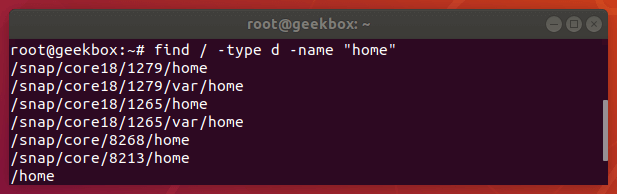
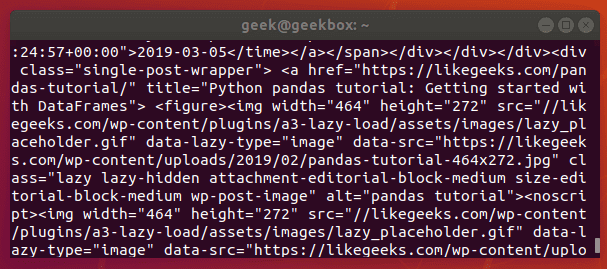
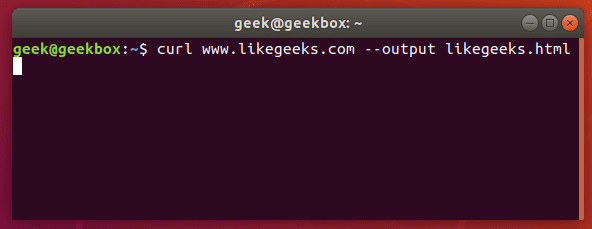
 In this tutorial, we will cover the cURL command in

 If you were to ask the general population what they know about blockchain technology, you wouldn’t be surprised to hear that most of them either know nothing at all or can connect the blockchain to cryptocurrencies. They wouldn’t be wrong. Cryptocurrency is, in fact, dependent upon blockchain technology and it is the technology that has paved the way for
  In this tutorial, we will cover


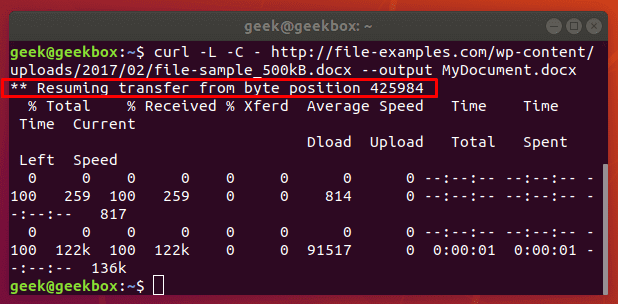
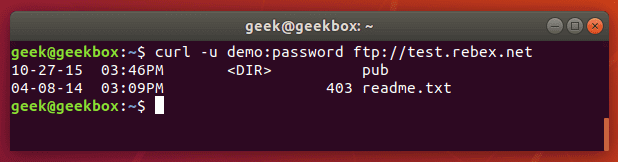
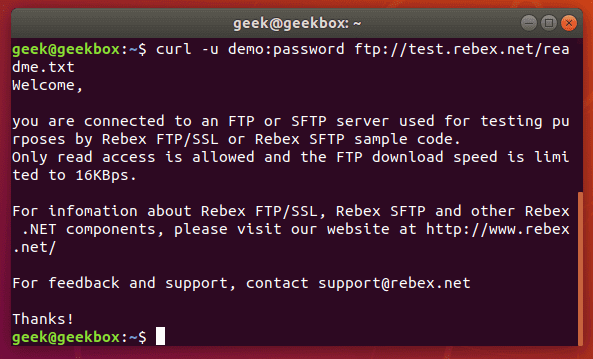
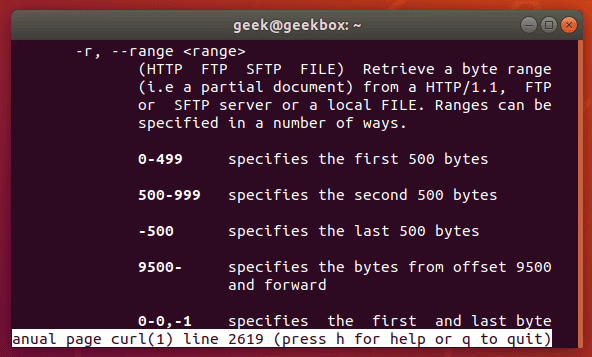
 In this tutorial, we will cover the cURL command in
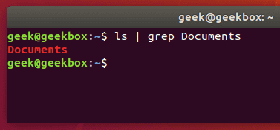 In this tutorial, you will learn how to use the very essential grep command in